Due to Photobucket's change in policy that requires high fees for using their service, (which originally was free), my original post of this tutorial no longer has its photos visible. Try going WAY back using this "way back machine" link. Sorry for the inconvenience.
Okay, here is how to use the homemade "nail loom". Although I use 2 or 3 thickness of yarn together, as one, to make the squares thick and firm, I have taken the pictures using only a single thickness of variegated, worsted weight, acrylic yarn so that you can better see what I am doing. I recommend that you use only one thickness on your first, practise piece and then once you get the hang of the procedure you graduate to more strands for a fuller appearance in the final square.
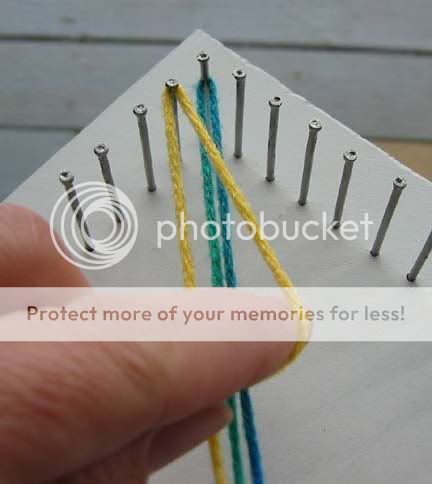
Start by turning the loom so that one corner is facing you. Place your yarn supply to your left. Tie the end of your yarn to the lower corner peg. I like to use a slip knot as it is easy to remove later.
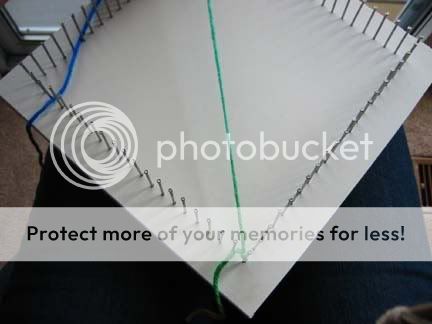
Drape your strand of yarn across the loom and around the opposite (top corner) peg,
clockwise.
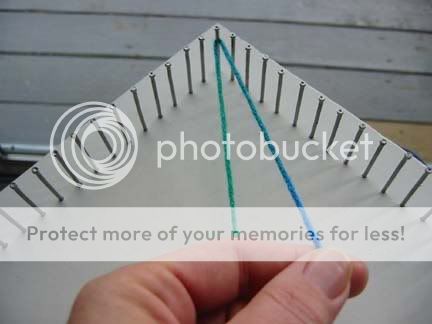
Bring it down to the lower corner again around the next empty nail to the right, and across to the next empty nail on the left ---
--- and back up to the upper corner you go.
After pivoting around the next empty nail at the top left hold it in that position ---
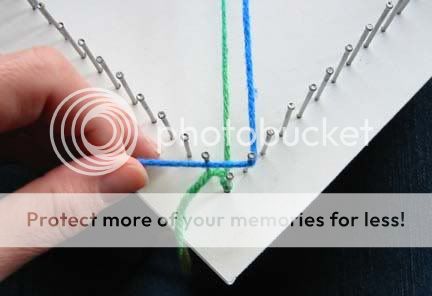
--- while you grab a large crochet hook and, going UNDER the middle strand on the loom, grab the working yarn ---
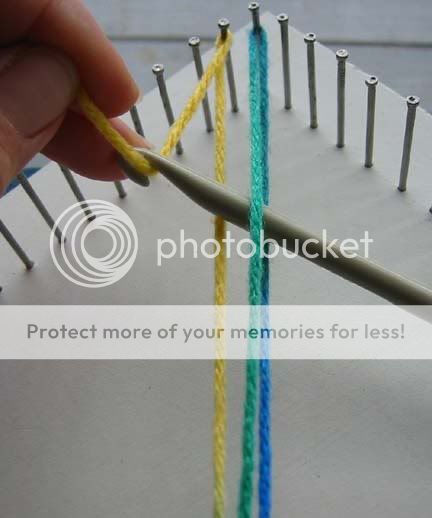
--- and forming a loop, drag it across to the next empty nail on the top right.
With that secured around the nail, take the lower half of the loop and pull it downward ---
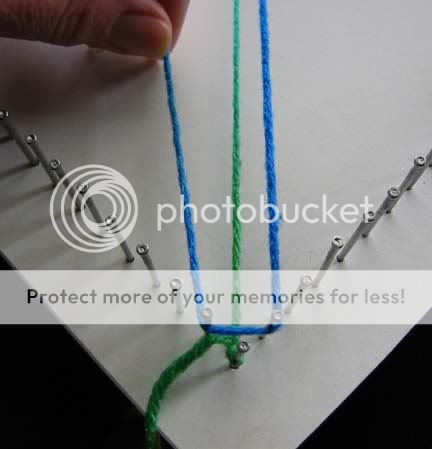
--- to the next empty nail on the lower right. As you snug this up you will see that the lower portion is already woven for you, thanks to the LOOP technique! Now it's just a matter of placing it around the first empty nail on the lower left, and you're heading back up to the top again.
Once again, pause after wrapping that empty nail on the top left, grab the hook and, weaving over and under (with this technique it works out that you ALWAYS start with an "OVER") ---
--- pull the loop through, wrap the next empty nail to the upper right, and drag the lower portion of the loop down to the next empty nail to the lower right.
--- with the lower portion already woven for you, wrap the lower left nail and proceed back to the top.
Back and forth you go filling the loom. When you get to a point where your crochet hook will no longer reach all the way across, do it in sections, holding the loop with your finger while you weave the hook in and out on the next section.
Continue repeating the steps until the loom is full and you have only the last nail on the left remaining unwrapped. Cut your yarn leaving a tail at least long enough to reach across the loom one more time ---
--- and then weave over and under with the hook and pull the final strand across and out the right hand corner.
Now, beginning at one corner, you can just pull up on your work, popping the loops off the nails.
Untie the beginning knot. All that is left is to weave in those beginning and ending tails.
My example square is all loosey-goosey and messy looking because it was done single stranded. Blocking would improve the look, but better yet, just use a thicker yarn or more strands ---
--- for a perfectly plump finished square.
These squares should be great for making blankets. All the squares are exactly the same size with exactly the same number of loops to sew into. Anyone who has ever had to put together a charity afghan, with it's various contributors making squares of unequal sizes and unequal numbers of rows, will appreciate the wonder of this uniformity!
Downloadable manuals for other loom types are available free from "
Eloomanation".
Edited to add:
I've had a number of questions over the years about the dimensions of the homemade loom and the number of nails. Although I think these things can vary and you'll still have success, here are the measurements from my particular loom:
The nails on the loom span 20cm on each side, with 21 nails on each side (including the corner nails) for 80 nails total. The distance between the nails is 1cm. The board itself is 25cm square, providing a 2cm border all around. Each finishing nail rises about 3cm above the surface.
Any questions?