Translate

Showing posts with label sewing room. Show all posts

Monday, February 03, 2020

Necessary Sewing

You may have been wondering if I actually sew in that beautifully redone sewing room. Why yes, there has been sewing. There just hasn't been much blogging about it.


This nightie/sleepshirt/whatever you want to call it, is one of my most recent ones, it and another just like it but in purple. I made them both using the Jalie pattern, #2805 Women's T-shirts for the upper part and then extended it to knee length and added the hem shaping of Jalie pattern #3245 Raglan Top, Racerback Tunic.

Something this plain I do less for the creating and more from simple need. I'm pretty picky about what I sleep in. Not one for the extremes of a flimsy negligee or a flannel granny gown, and not comfortable wearing pajama pants, I like the comfort of something like an oversized men's t-shirt  but longer so I'm not indecently exposed. I found a couple many years ago and wore them until they fell to pieces. It was time for new ones and I couldn't find what I wanted. Necessity is the drive behind this creation. 

Sunday, December 08, 2019

Unveiling and Grand Tour

Welcome to my new and improved sewing room! Let me give you the "Grand Tour".


The decorating theme of the room is "boro", a type of patching and simple stitching technique originating in Japan. In keeping with that theme I made a welcoming rag wreath for the door using this tutorial found on Pinterest, with some changes. For one thing I used denim from jeans so the strips needed to be longer so I could tie them. I also added strips from quilting cottons in indigo prints and finally added small white artificial flowers.


Standing just inside the doorway and looking across to the window you get a good view of the wall colour (Behr paint's "bootcut") and the beautiful vinyl plank flooring my husband laid. The floor colour is "driftwood". I love it!

Together he and I made the 
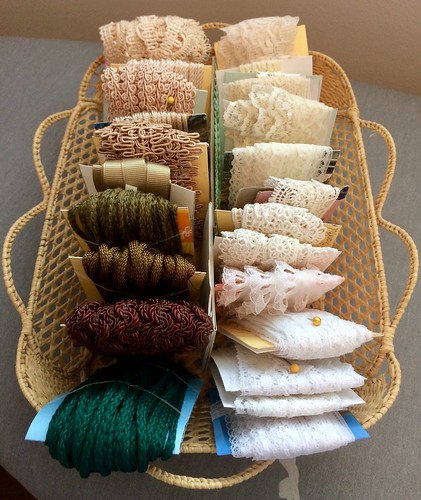
pressing station on the left. More details on a previous blog post if you follow the link. I keep all things related to pressing and measuring, along with much of my cutting tools, in the drawers and behind the cupboard doors. The baskets below are full of fabric.

Directly under the window is a narrow table that was originally for a knitting machine. I didn't initially plan to use it in here but I have found I need a convenient "landing place" for things that I want available, yet out of the way, when I'm working on a project. It allows my pressing station and sewing table to be clutter free when they are in use. The little table also works well for spinning with my charkha and yet it is narrow, only 16" deep, so it doesn't take up much room. The runner on the table right now is a Saori weaving and it's just there for the Christmas season.

General lighting is provided by the LED track lighting on the ceiling, purchased from Home Depot, while bright task lighting is provided by shop lights mounted beneath Bergshult/Granhult wall shelves from IKEA.


As practical as all those lights are I think my favourite are the little dragonfly lights. I leave them on when I'm not in the room and the main light is off. It provides a very inviting, soft, "mood" light.


Standing at the window and looking back towards the other wall you can see my Linnmon/Alex desk from IKEA, another task light mounted under a shelf, and a little shelf bought ages ago at Micheal's. I keep most of my embroidery floss clipped to it and sorted by colour number. The chair is a Langfjall purchased at IKEA. Yes, we made several trips to IKEA. 


Continuing the Boro patching/stitching theme I sewed custom covers for each of my machines, sewing, serging, and coverstitching. The covers might look lumpy and bumpy but it's because they follow the shape of the machine underneath. 


And here's the real workhorse of the room. My 25 cube KALLAX unit. It's not in the configuration I originally intended. Once I started putting my stuff away I found that I wanted more doors and less bins. A lot of what I had to store worked best on a shelf, rather than in a pull out bin but I really did not want all the visual clutter of filled shelves showing so we bought more of the doored inserts. I love the clean, clutter free look.


I reserved the centre top shelf as a living space for "Willie", my little creative mascot, a Dream High Studio House Elf.


As we leave my little sewing sanctuary I want to show you a few small details up close.


Beside the door and visible from my sewing chair, a cute little clock purchased from an Etsy seller some time ago.


Above the door more sewing mice. This time in a framed cross-stitch my daughter made for me years ago.


And shutting off the lights as we leave the room -- a light fixture decorated with alcohol inks. 

If there is anything else you'd like to see up close, or if you have any questions about items you've seen in the "tour" just let me know and they may be covered in a future blog post. 


Tuesday, November 26, 2019

A Restless Night

Like a young child on Christmas Eve I didn't get much sleep last night. I woke at 3am with visions of sewing room renovations dancing in my head! Excited for our trip to IKEA to finally get my desk and storage unit, I just couldn't sleep a moment longer. I laid there quietly like a good girl though and counted the minutes until morning.


The flooring is in, and I LOVE it. It's exactly what I wanted. The Linnmon/Alex desk and 25 cube Kallax storage unit (5 tall, 5 wide) won't be built until the mouldings are in, but that will be soon. They are painted and ready to be installed, perhaps tomorrow. 

Along with the actual Kallax unit we picked up an assortment of inserts. I'll have 8 cupboard doors, 6 drawers, 5 white and 5 blue Drona boxes, and 5 Branas baskets, shown above with the boro patched and stitched liners that I just finished making for them. 

Monday, November 11, 2019

Progress!

Preparation is complete for tomorrow's spraying of the ceiling in my sewing room.


Progress!

Sunday, November 03, 2019

Pressing Station

While I wait for my sewing room to be completed I am keeping busy with little projects related to the rennos going on in there.


Before the room was even started my husband and I got to work on this sturdy new pressing station. My old ironing board was rickety and threatened to toss my irreplaceable iron to the floor. I am very protective of that iron since it very well might be the last of the ones available *without* an automatic shut off. I find turning around, mid project, to use an iron and finding it off and cold to be infuriating! 


My husband and I built a standard 4 x 2 cube KALLAX unit from IKEA then he added sturdy pine boards, cut to size, to the top and the bottom. Another board, with slightly wider and longer dimensions and a bit of an added rim, allows the entire padded surface to be lifted off if a cover change becomes necessary and yet it is very sturdy and doesn't move around.

The top is 3 layers of cotton quilt batting, a layer of heat resistant ironing board cloth, and then the outer fabric which is a heavy cotton decorator fabric. For now, with my sewing room down for renovations, the pressing station is set up in our home office area and has been seeing a fair bit of use. It's a delight to use!


We finished off the pressing station with 2 drawer units (total of 4 drawers) and 2 doored units. Those additions did come with drawer pulls but they just didn't have the personality and crafty look I wanted for a creative space so I got to work and transformed 1 1/4" wooden knobs from Home Depot with paint, a simple decorative flower motif, and several coats of Varathane. I'm very pleased with the way they turned out.


The lower row of cube cubbies is filled with BRANAS baskets and I've been busy making liners for them of boro patchwork and accents of simple, bold stitching.


Speaking of patching -- here's how the progress in the room is going. The closet is out, the drywall is up, and the seams are being mudded and sanded. Next step will be priming the whole room and then spraying texture on the ceiling. Or maybe it's the other way around? Anyway, I'm not the one in charge of that so all I can do is pace, peek in now and then, and continue on with my little detail work.


All links in my blog posts are there only for your convenience. I get no reimbursement if you use them.

Tuesday, October 08, 2019

Under Construction

We've been very busy lately. My sewing room is getting a much needed overhaul. Over the past few days, with a whole lot of work and many, many trips up and down the stairs, I've gone from the photo on the left, to the one on the right.


Much of what had been in the sewing room landed in the family room downstairs where it will have to stay until the sewing room is once again habitable.

Plans are in the works for new flooring, new paint, a large Kallax cube storage unit, a desk from IKEA, and a sturdy new pressing station made from a Kallax cube unit. The biggest ordeal will likely be the removal of a built in closet and patching the scars it leaves behind.


But this closet takes up way too much space in the tiny 9'5" x 9'9" room and doesn't store a lot in return. My new desk will go there instead.

Wednesday, October 11, 2017

A Year to Clear

Last week, I stumbled across a clutter clearing course called "A Year to Clear What is Holding You Back". It wasn't expensive so, on a whim, and following my intuition, I signed up. Rather than tackling your clutter in an intense and all consuming way and risking burn out and rebound issues it focuses on the "slow drip" method. The idea is to clear a little bit each day forming a habit, while spending time uncovering any deep rooted and personal reasons for clutter, both inside and out, emotional as well as environmental clutter.

Tidying up the sewing room one baby step at a time.

It's amazing how the commitment to clearing just one item, or for just a minute or two each day gains momentum all on its own and without any forcing of it. In only one week I can see improvement, but more importantly I feel it. The energy in the home improves when you take steps towards getting rid of unneeded items and taking care of the items worthy of saving.

Yesterday I started tidying up the sewing room one baby step at a time. I gave the room a high priority since the mess and cramped quarters robs me of the joy I normally find in being creative. First to get under control was a mess of lace and trims saved for crazy quilting. I consider these to be "keepers" but the loose jumble had taken over a small shelf and the mess was an eyesore, a source of aggravation, and not easy or pleasant to use.

This looks and feels so much better! The pretty little basket was one I had on hand but I'll have to replace it with something a bit larger. I know that through my lack of organization in there, and my multiple hobbies, I have more than one "stash pile" of lace, ribbons, and trims and I'd like to combine them all in an organized, compact, and more user friendly way. The 2" x 3" cards (cut from greeting cards) works well but I'll need a bigger container.