
Monday, April 13, 2015
To Be Returned
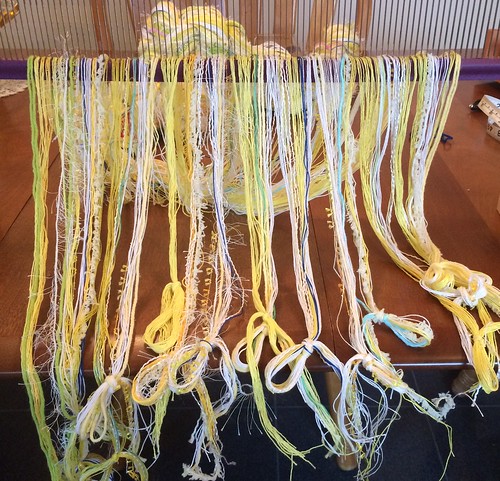
I now have the heddles threaded and the reed and harnesses are ready to be returned to the loom.


Sunday, April 12, 2015
Saturday, April 11, 2015
Easy Breezy Lemon Squeezy
The new warping board and stand makes winding a warp such a breeze that I was sort of disappointed to be finished.
This is approximately 250 threads and 8 metres in length.
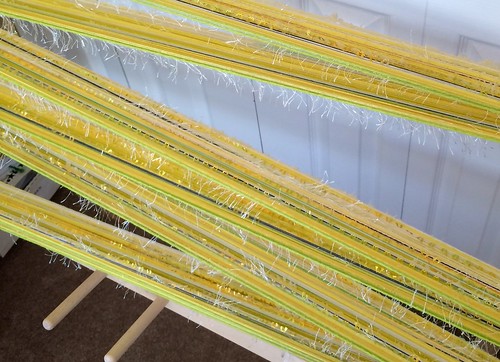
The colour is closest to being like the first picture. It's primarily a vibrant yellow, but there is a fair bit of white as well and a sprinkling of green and a touch or two of royal blue. Still not sure about the blue. If it doesn't look right once I get the warp beamed I'll just pull it out and add supplemental warps of a softer colour.
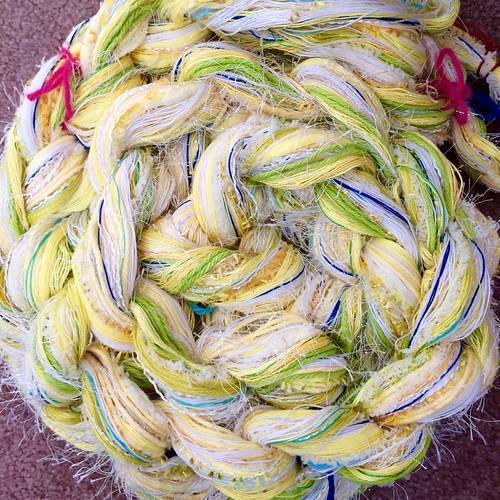
The warp is mostly cotton with a few threads of synthetic novelty yarns. I'm participating in a weave-a-long in the "Weaving in the Saori Way" group on Ravelry. The intent is to weave yardage for some sort of summer clothing.
This is approximately 250 threads and 8 metres in length.
The colour is closest to being like the first picture. It's primarily a vibrant yellow, but there is a fair bit of white as well and a sprinkling of green and a touch or two of royal blue. Still not sure about the blue. If it doesn't look right once I get the warp beamed I'll just pull it out and add supplemental warps of a softer colour.
The warp is mostly cotton with a few threads of synthetic novelty yarns. I'm participating in a weave-a-long in the "Weaving in the Saori Way" group on Ravelry. The intent is to weave yardage for some sort of summer clothing.
Thursday, April 09, 2015
The Stand Is Standing!
Ok, so it's barely standing. I've got all the right bolts in all the right places but they are not fully tightened. I've been digging through my husband's very large tool box but I haven't been able to find a metric screwdriver and wrench that will give me a good grip. I'll have to wait until he comes home to lend a hand.
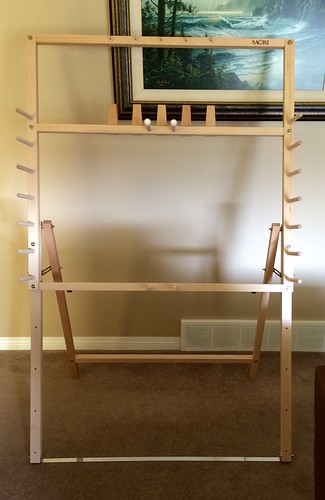
This is my new Saori warping board and stand!
This is my new Saori warping board and stand!
Wednesday, April 08, 2015
Not At All Mellow
I'm participating in a "Handwoven Clothing Weave-A-Long" in the "Weaving in the Saori Way" Ravelry forum.
This is the beginning of my warp.
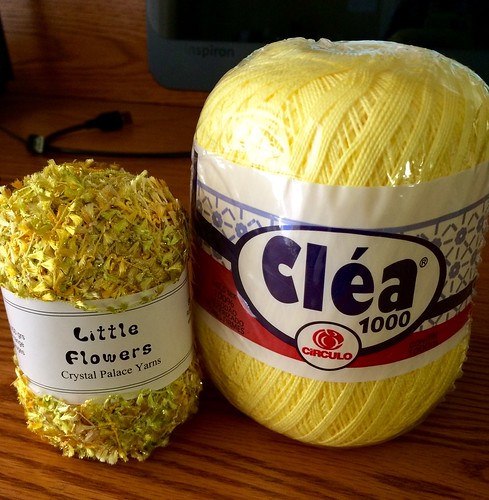
The "Clèa" is 100% mercerized cotton crochet thread. The "Little Flowers" by Crystal Palace Yarns is 96% nylon 4% metallic fibre.
I really want to weave YELLOW but, unfortunately, yellow is the least abundent colour in my stash. I'm also very picky about my yellows. I don't want that "school bus" yellow, nor do I want an autumn-like golden yellow. I want a clear, vibrant pure hue, not one watered down to a pastel, nor muddied and dulled. I want sunshine yellow, lemon yellow,
This is only the beginning of course. There is not enough yardage in those two balls to wind an entire warp long enough to make some sort of clothing (haven't decided yet what type of clothing I'll make), so I'll be adding to this in some way. White for sure. Maybe some black. We'll see.
But for now I'm off to open a parcel that's waiting for me. A brand spankin' new Saori warping board and stand. Yay!
This is the beginning of my warp.
The "Clèa" is 100% mercerized cotton crochet thread. The "Little Flowers" by Crystal Palace Yarns is 96% nylon 4% metallic fibre.
I really want to weave YELLOW but, unfortunately, yellow is the least abundent colour in my stash. I'm also very picky about my yellows. I don't want that "school bus" yellow, nor do I want an autumn-like golden yellow. I want a clear, vibrant pure hue, not one watered down to a pastel, nor muddied and dulled. I want sunshine yellow, lemon yellow,
This is only the beginning of course. There is not enough yardage in those two balls to wind an entire warp long enough to make some sort of clothing (haven't decided yet what type of clothing I'll make), so I'll be adding to this in some way. White for sure. Maybe some black. We'll see.
But for now I'm off to open a parcel that's waiting for me. A brand spankin' new Saori warping board and stand. Yay!
Tuesday, March 31, 2015
Sew Fitting
When the last sewing project I did was a huge disappointment because the fit was so poor I decided enough was enough and invested in the Sure Fit Designs system for fitting, designing, and sewing.
I'm happy to say that my first project using the Sure Fit Designs system has been a huge success! My fleece lined vest fits beautifully.

Over 15 years ago I took Fashion Design courses in college for a couple of years. I did well designing and developing patterns but I never did catch on well to the nuances of custom fitting. Fitting, though covered, really was not an emphasis in the program.
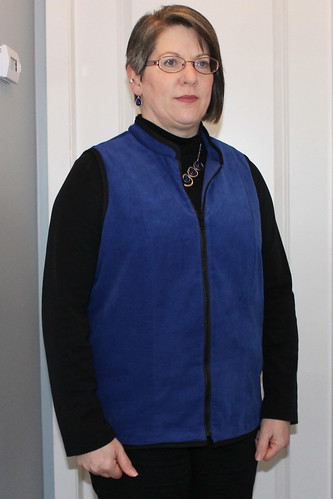
When I received my Sure Fit Designs package I went straight to work drawing out a sloper using my own personal measurements. Of course due to variances in individual body shapes even with the correct measurements there were adjustments to be made. In my case there were several.
I had to move the shoulder seams forward by a 1/2", and make an adjustment that adds additional length to the upper back to allow for the rounding of my shoulders. Those are the two body variances that cause me the most grief when it comes to ready to wear purchased clothing or unaltered sewing patterns. Store bought shirts and jackets have a tendency to slide back, choking me in front and yet gaping behind my neck and bunching up at the back waist.
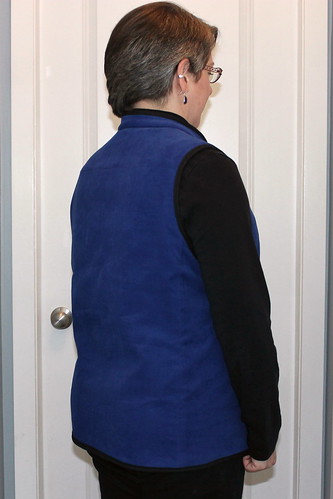
I also added some length to the centre front, but could clearly add a little more yet as it still rises a bit in that spot. Not as noticeable in person as it appears from the next picture.
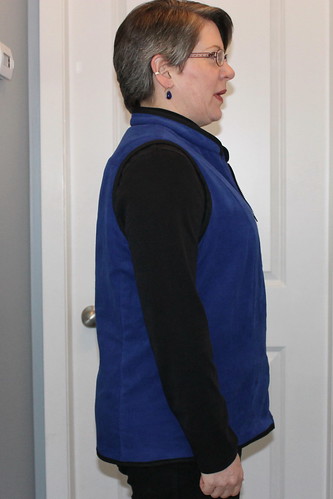
The back fits really well. Plenty of room for movement and ease in my hip area without the shoulders being overly large.
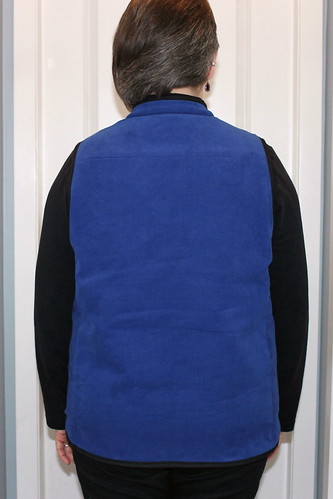
It took quite some time to develop the pattern to make this vest. First I had to take measurements, draw the custom sloper (fitting pattern), sew it up and fit it once, making note of necessary changes, redraw the pattern with those changes, and then sew the sloper again. Both fittings required a series of photos be taken so that I could receive input from Glenda Sparling of Sure Fit Designs. For me, that consultation process with Glenda is the most valuable part of the system. Without her input I would have been at a loss!
After that second fitting I was good to go and started on the actual development of a garment pattern. I chose a vest pattern that is available as a "how to". I felt for the first item developed from my personal sloper I would like the additional guidance of taking it step by step through the pattern development process. I made individual changes beyond just fit though. For one thing I added a yoke section to the back. I did this because my rounded shoulders necessitated shoulder darts which I wanted to eliminate in the vest. I moved them to the yoke seamline. I also lengthened the vest by 2".
When it was time to test my pattern I used fleece that I had an ample supply of. Once I was sure I had the fit right I decided the fleece "test" could serve as the lining to the "real" vest which I chose to sew from some very nice, leftover fine wale corduroy. The vest could have been reversible if I could have found a reversible zipper. No such luck here in my neck of the woods though!
Wednesday, March 25, 2015
Cabernet Infinity Scarf
This one has been a long time in the making simply because I only picked it up occasionally. I've been doing more sewing and weaving lately than I have knitting.
This is the Cabernet Infinity Scarf from the pattern by Monika Sirna I started it way back in January.

The fact that it matches the Saori hat was unintentional and just a bonus.
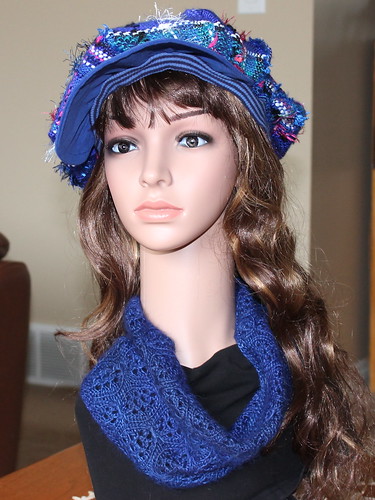
I just have to say that I'm not all that impressed with the yarn I used. In the skein it was deliciously soft and a bright royal blue that I was in love with -- BUT --
This is the Cabernet Infinity Scarf from the pattern by Monika Sirna I started it way back in January.
The fact that it matches the Saori hat was unintentional and just a bonus.
I just have to say that I'm not all that impressed with the yarn I used. In the skein it was deliciously soft and a bright royal blue that I was in love with -- BUT --
- It split like crazy while being knit.
- The high silk content meant that wisps of it clung to, and snagged on, the dry spots on my fingers while I was knitting.
- The dye tinted my hands blue while I was knitting.
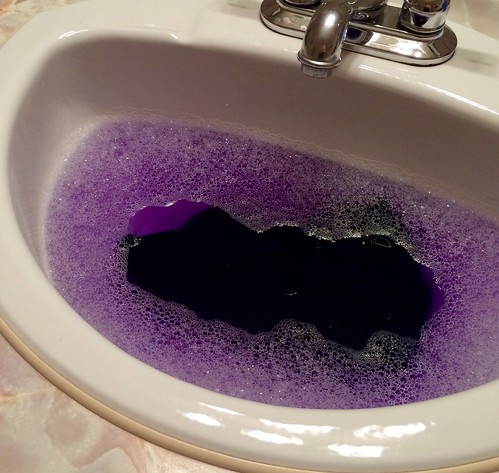
- And a LOT of dye came out of the finished article when I did it's wet finishing!
- The colour was visibly duller after wet finishing.
The yarn was Knitpicks Diadem Solid in the Sapphire colourway. Interesting that that particular colourway is no longer available. Maybe the dye problem was limited to only that colour? I still won't be buying any more though. The splitting and fuzzing was annoying enough alone, without the additional annoyance of the blue dye bleeding.
Sunday, March 22, 2015
Late for Saint Patty
Okay, this is more than a little late for St. Patrick's Day, but inspired by Gene Black's example I had to try spinning up a little of the green and gold.
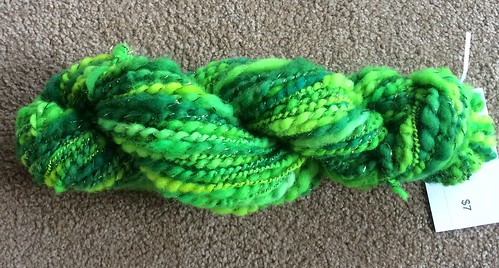
And no, that little tag that says $7 does not mean this skein is for sale. Whenever I can I reattach the fibre vendor's tag to the skein so that I can remember the fibre content and the source. It's incredible how fast I can forget such things otherwise! This was 2oz of "local wool" hand dyed by HummingBeeFarm. It blows my mind how far this spinning technique can take 2oz of yarn! This is a large and lofty yet lightweight skein.
And no, that little tag that says $7 does not mean this skein is for sale. Whenever I can I reattach the fibre vendor's tag to the skein so that I can remember the fibre content and the source. It's incredible how fast I can forget such things otherwise! This was 2oz of "local wool" hand dyed by HummingBeeFarm. It blows my mind how far this spinning technique can take 2oz of yarn! This is a large and lofty yet lightweight skein.
Saturday, March 21, 2015
Side Fringe
Played around a bit with using clasped weft paired with thrums to create a side fringing effect.
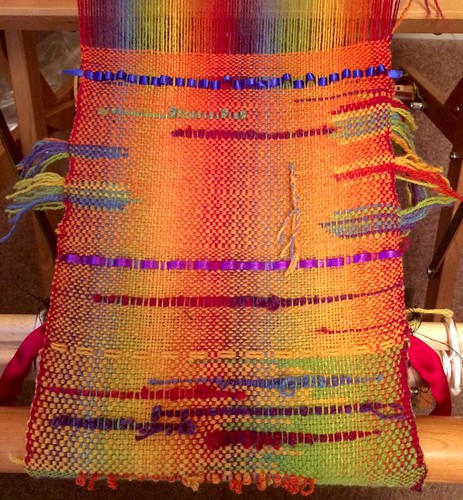
The weft yarn has now gradually worked its way toward orange. I have kept the colour progression of the Kauni Rainbow yarn in the main weft by labelling the bobbins and then winding them onto one bobbin then rewinding them onto another so the colour is reversed and lines up with the bobbins that come before and after. Clear as mud? Sorry, it's hard to explain, but easy to actually do.
The weft yarn has now gradually worked its way toward orange. I have kept the colour progression of the Kauni Rainbow yarn in the main weft by labelling the bobbins and then winding them onto one bobbin then rewinding them onto another so the colour is reversed and lines up with the bobbins that come before and after. Clear as mud? Sorry, it's hard to explain, but easy to actually do.
Thursday, March 19, 2015
Sunshine On a Rainy Day
It's gloomy and rainy here today but I'm working on my own little patch of sunshine.
This part brings to mind sea creatures dancing in a rainbow ocean.
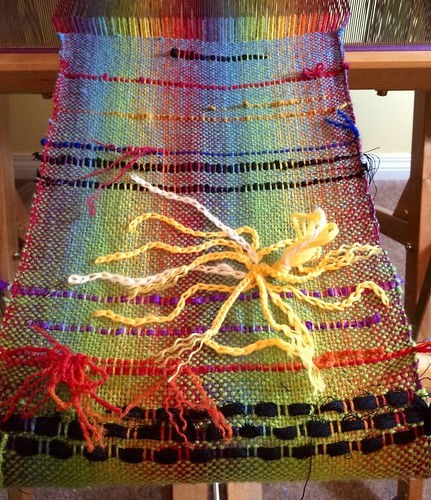
I'm really happy with how the inlay in this next section worked out. I used a thin strand of handspun that had a lot of variation in colour, and I made four passes with it before each clasped weft pick. I love the way it distorted the weft around it, allowing more of the warp threads to show, and packed in until it was laying diagonally in places. Fun!

And here's where, at 10:08am, I stopped for the morning. Time to get on with doing some other things with my day!
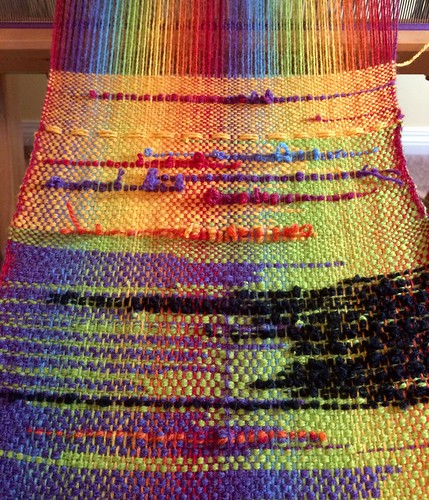
This part brings to mind sea creatures dancing in a rainbow ocean.
I'm really happy with how the inlay in this next section worked out. I used a thin strand of handspun that had a lot of variation in colour, and I made four passes with it before each clasped weft pick. I love the way it distorted the weft around it, allowing more of the warp threads to show, and packed in until it was laying diagonally in places. Fun!
And here's where, at 10:08am, I stopped for the morning. Time to get on with doing some other things with my day!
Wednesday, March 18, 2015
A Fresh Start
After resleying for a closer sett I finally got this warp retied to the breast beam and ready to go again.

Cheerful, bright colours for a garden banner. There will be way more yardage than I need so I'm just going to play and then use my favourite section for the banner and the rest will be set aside to "renew" the banner as it fades and is subject to weather wear and tear.
Tuesday, March 17, 2015
Second Attempt
I'm happier with the plying on this skein.
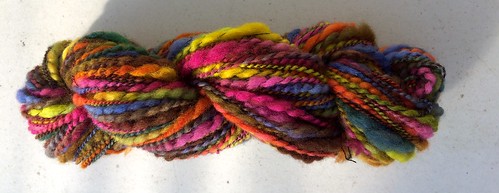
I'm using a slightly different approach and it is resulting in more even plying through the thick sections. This time I held the two strands being plied in opposite hands. I originally started off trying to keep the thick and thin strand tensioned while holding the thin thread loosely and allowing it to wrap/ply, but I hadn't gone far when I discovered it worked better for me doing it the other way. So after a bit of experimenting I held the thin black thread fairly taut and let the softly spun thick and thin strand do the wrapping/ply. I found I was better able to control the rate of plying through the thick areas this way.
Now I just need more practice. And that will require more of a resource I seem to be in terribly short supply of lately --- TIME!
Sunday, March 15, 2015
Fibres West 2015
Friday was my day to attend Fibres West in Cloverdale, BC.

If you are interested you can click the photo to enlarge it.
If you aren't a "fibre type", it might not seem like much, but each of those booths is jam packed full of fibre goodness that I don't normally have easy access to. I tend to stock up, binge style, once or twice a year.

I could spend hours shopping at such an event, while the whole idea of a day spent browsing fibre arts related booths could bring my husband to tears I think. Loving man that he is though, he drove me down, uncomplaining, only to return a few hours later when I texted to let him know that I had had enough (or had spent enough --- which is the same thing in my books.)
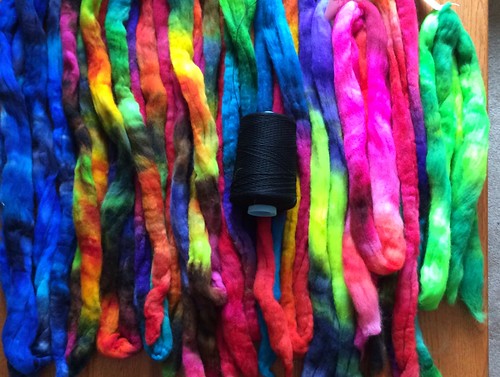
This is the haul I came home with. 10 different colourways of beautiful roving dyed by the folks at the HummingBeeFarms booth, and a large cone of black mercerized 2/8 cotton. It will all eventually make its way into my weaving projects.
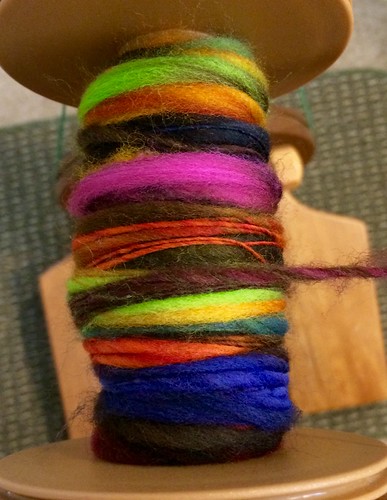
I wasn't home long before I was trying it out!
The vendor at HummingBeeFarms booth had some lovely skeins of Thick'n'Thin yarn for sale. She was good enough to explain her technique to me so that I could go home with an armload of her beautiful hand dyed skeins to give the technique a whirl.

I'm not there yet, hers was more uniformly plied than mine. But I've discussed the issue with a few kind forum members and I have some ideas to try to see if I can't get something closer to what I had been shown in the booth. Don't get me wrong, I DO like this skein, I just think I can do better.
I could spend hours shopping at such an event, while the whole idea of a day spent browsing fibre arts related booths could bring my husband to tears I think. Loving man that he is though, he drove me down, uncomplaining, only to return a few hours later when I texted to let him know that I had had enough (or had spent enough --- which is the same thing in my books.)
This is the haul I came home with. 10 different colourways of beautiful roving dyed by the folks at the HummingBeeFarms booth, and a large cone of black mercerized 2/8 cotton. It will all eventually make its way into my weaving projects.
I wasn't home long before I was trying it out!
The vendor at HummingBeeFarms booth had some lovely skeins of Thick'n'Thin yarn for sale. She was good enough to explain her technique to me so that I could go home with an armload of her beautiful hand dyed skeins to give the technique a whirl.
I'm not there yet, hers was more uniformly plied than mine. But I've discussed the issue with a few kind forum members and I have some ideas to try to see if I can't get something closer to what I had been shown in the booth. Don't get me wrong, I DO like this skein, I just think I can do better.
Friday, March 13, 2015
Mixed Feelings On This One
I had a collection of scraps left over from sewing my blue Saori jacket. They weren't overly large but there were a number of them. I discovered I could cut all 8 wedges for a hat out of them.


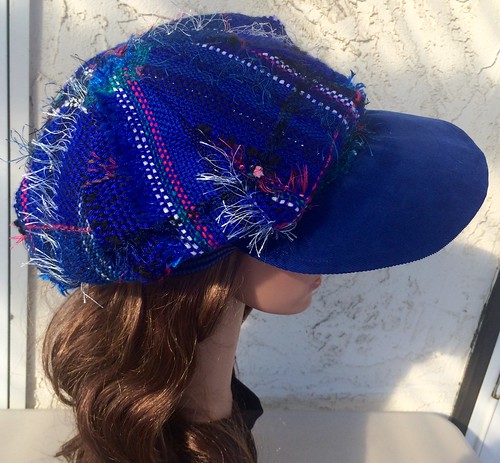
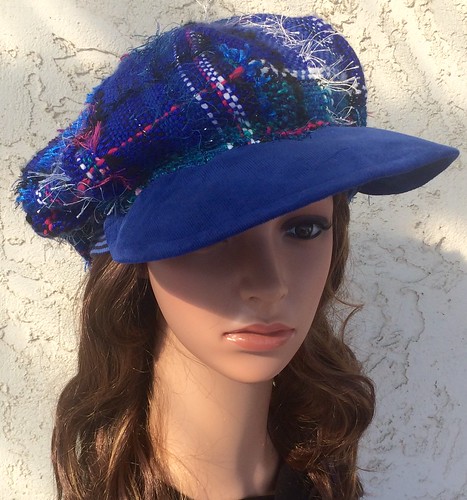

I've been needing a hat with a brim for those early morning and late evening walks when the sun is low on the horizon and seems intent on shining right in my eyes! Sunglasses are no good because there are enough long shadows at that time of day that my polarized glasses just seem to blind me.
So I worked at sewing all those scraps together.
And I added a generous brim to cut the sun's glare.
I fought with the lining a bit because it wanted it roll to the outside, but in the end I have a hat that should have been serviceable but I'm kind of on the fence about how I feel about it.
I've always felt more than a little self conscious wearing hats and this one is -- well -- "out there" with its bold, bright colour and the wild texture. I did wear it for one walk and while it worked well for the intended purpose I felt silly, a bit like Crazy Aunt Pearl. On a positive note I did have a lady that was parked at the side of the road roll down her window just to tell me how much she loved my hat.
I suppose I just need to walk with the confidence and panache of someone who is wearing a pricey designer original, hey? You know, instead of slinking along like I'm embarrassed?
I suppose I just need to walk with the confidence and panache of someone who is wearing a pricey designer original, hey? You know, instead of slinking along like I'm embarrassed?
Thursday, March 12, 2015



Sunday, March 01, 2015
That About Covers It
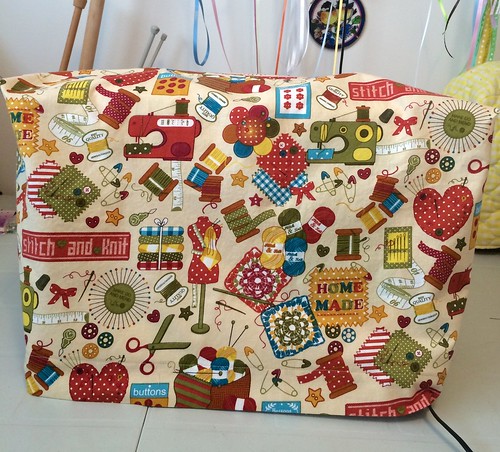
I was doing a bit of a clean up in my sewing room and came across some fabric I bought ages ago with the idea of making a dust cover for my (then) new sewing machine. I love that the fabric motifs include many of my hobbies; sewing, knitting, crochet, embroidery, and embellishing are all represented. There is even some quilting in there, but it's been years since I've done any of that.
I stopped what I was doing, right then and there, and started drafting out a pattern for the cover.
The machine came with a flimsy, plastic cover that I've been using up until now. The ho-hum plastic cover did fit well so I used the measurements to draft the pattern for the one sewn from novelty fabric.
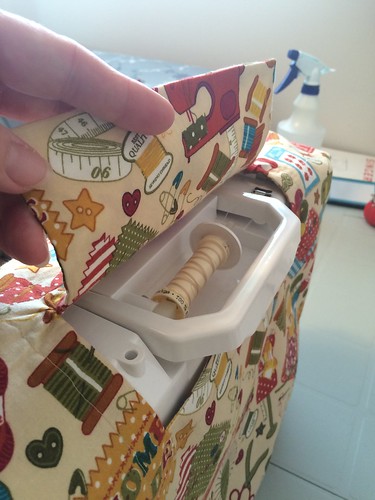
I even included the little flap that covers the carry handle, but allows access should I need to move the machine.
And now with that done I suppose I should really go back into the sewing room and continue the tidying? ---- Nahhh, that can wait. I'd rather get back to drafting a bodice sloper I was working on. The equipment from that is taking up a corner of the kitchen table and I'd like to get it cleared away.
There is also the cowl I've got about 80% knitted, the doll sweater that is half knit, and the wool rainbow warp waiting to be retied on the loom and worked on.
Do you sense a bit of Manic Crafting going on around here?
I stopped what I was doing, right then and there, and started drafting out a pattern for the cover.
The machine came with a flimsy, plastic cover that I've been using up until now. The ho-hum plastic cover did fit well so I used the measurements to draft the pattern for the one sewn from novelty fabric.
I even included the little flap that covers the carry handle, but allows access should I need to move the machine.
And now with that done I suppose I should really go back into the sewing room and continue the tidying? ---- Nahhh, that can wait. I'd rather get back to drafting a bodice sloper I was working on. The equipment from that is taking up a corner of the kitchen table and I'd like to get it cleared away.
There is also the cowl I've got about 80% knitted, the doll sweater that is half knit, and the wool rainbow warp waiting to be retied on the loom and worked on.
Do you sense a bit of Manic Crafting going on around here?
Tuesday, February 24, 2015
Little Purse
My old purse was wearing out and I couldn't find another that I really liked so I sewed up this little one using "The Nearly Tote-All Purse-O-Nality" pattern from Palm Harbor Patterns.
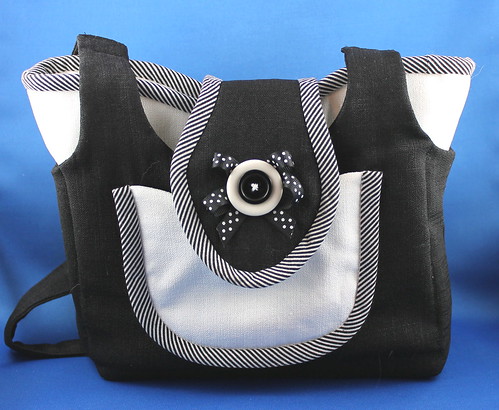
It measures ll.5"W x 8" H x 2.5" D, and has 5 exterior pockets (4 between the inner and outer purse, and one patch pocket), and two small patch pockets inside.
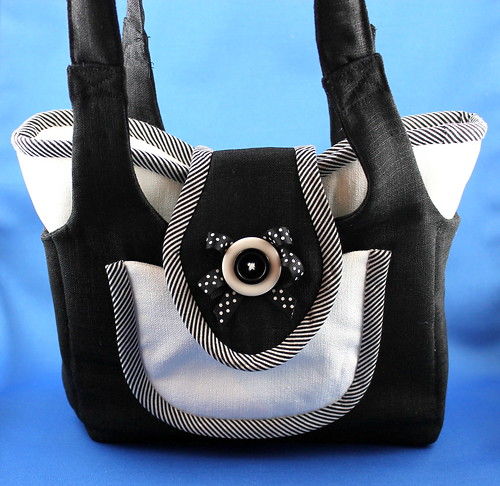
My thought had been to maybe use the pattern to make Saori purses, but there is WAY too much work in one to ever make them to sell. It took me the better part of three days to sew up!
This little purse pattern is incredibly well designed. Both the inner and outer purse sections are completely lined and have a layer of quilt batting. The inner purse also has a layer of heavy duty interfacing making this purse much sturdier than many home sewn bags of it's type.
I don't love it, but I do like it well enough to use it until such time that I find a purse that I do well and truly love.
It measures ll.5"W x 8" H x 2.5" D, and has 5 exterior pockets (4 between the inner and outer purse, and one patch pocket), and two small patch pockets inside.
My thought had been to maybe use the pattern to make Saori purses, but there is WAY too much work in one to ever make them to sell. It took me the better part of three days to sew up!
This little purse pattern is incredibly well designed. Both the inner and outer purse sections are completely lined and have a layer of quilt batting. The inner purse also has a layer of heavy duty interfacing making this purse much sturdier than many home sewn bags of it's type.
I don't love it, but I do like it well enough to use it until such time that I find a purse that I do well and truly love.
Thursday, February 19, 2015
Introducing Hettie
When Hettie arrived on Tuesday she was all in pieces. I hope it isn't because her trip from China was an ordeal. It did take several weeks.

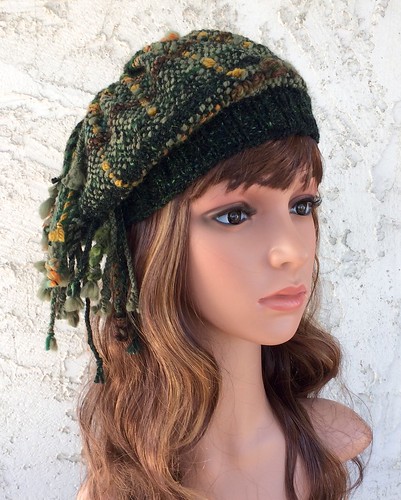
Once I figured out which side of her "body" was up she she pulled herself together nicely.
Hettie Mannakin hopes to have a long career serving as a hat and scarf model.
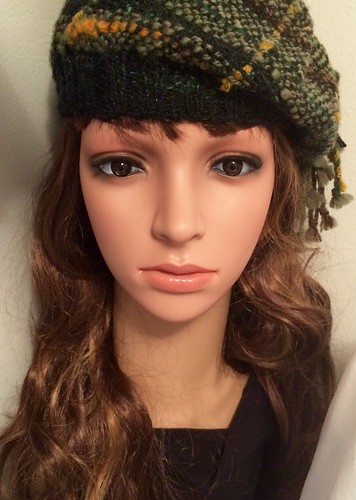
Poor Hettie is a bit cross-eyed. It's too bad her eyes are not repositionable like those of my ball jointed dolls.
Wednesday, February 18, 2015
6 Yard Experiment
I'm not sure where this is headed. I have six yards to play with and I intend to experiment and have fun. Hopefully in the end at least one section will be worthy of fulfilling the warp's original intent which is to be a colourful garden banner.
My initial experiments are not shown. They turned out so poorly that I unwove them and started again. I have discovered that my sett is a little too loose to show the pretty warp colours nicely without using great care in placing the weft, and the weft itself needs to be very fine or it completely obscures the rainbow warp.

So my plan at this point (subject to change as my creative muse guides me) is to weave about 32" of this very loose, gauzy effect, then cut it off, resley the reed with a closer sett, and carry on experimenting. I figure a closer sett will give me more weft options.
In the meantime I'll continue on weaving as I am now for the planned 32". I'll see how that looks off the loom. Because it is so loosely woven it might have a tendency to collapse and become "sleazy". If that happens it may be subjected to some experimental felting. When that is done I might decide to add interest with some surface embellishing.
This semi-transparent effect is being achieved by using one black wool weft strand, that is about equal in thickness to the coloured warp strands, alternating with a very, very, fine silver thread. I'm hoping the silver strand will sparkle in the sun when the weaving is hung in the garden.
My initial experiments are not shown. They turned out so poorly that I unwove them and started again. I have discovered that my sett is a little too loose to show the pretty warp colours nicely without using great care in placing the weft, and the weft itself needs to be very fine or it completely obscures the rainbow warp.
So my plan at this point (subject to change as my creative muse guides me) is to weave about 32" of this very loose, gauzy effect, then cut it off, resley the reed with a closer sett, and carry on experimenting. I figure a closer sett will give me more weft options.
In the meantime I'll continue on weaving as I am now for the planned 32". I'll see how that looks off the loom. Because it is so loosely woven it might have a tendency to collapse and become "sleazy". If that happens it may be subjected to some experimental felting. When that is done I might decide to add interest with some surface embellishing.
This semi-transparent effect is being achieved by using one black wool weft strand, that is about equal in thickness to the coloured warp strands, alternating with a very, very, fine silver thread. I'm hoping the silver strand will sparkle in the sun when the weaving is hung in the garden.
Tuesday, February 17, 2015
Wool Rainbow
A gift from my daughter's destashing. 100% wool, Kauni Effektgarn ---

--- and a garden stake meant for holding flags or banners ---

---will hopefully play nicely together and become a Rainbow banner for my garden. I use the term "garden" rather loosely here. I realize that a few tulips gathered around an apple tree does not a garden make. I'm no garderner. Work with me here, m'kay? At least the banner will bring some colour to the mud and grass back there.

I wanted the warp to retain the same colour progression as the yarn did in the balls, but wasn't sure how to go about that. The traditional method of winding a warp has you going down, reversing, and coming back up again measuring each warp strand. That wouldn't work for my purpose because it would reverse each warp strand and interrupt the perfect colour progression.
Enter the wonders of the Internet and online forum friends. I asked for a brainstorming session on this problem and less than 24 hours later someone came up with the solution! They suggested that I measure the warp in a complete circle, and they even pointed me in the direction of a tutorial. The tutorial was written for hand painted skeins being prepared for faux ikat, but it works equally well for any interesting yarn that you want to preserve the colour sequence of. I immediately pinned the tutorial to my Pinterest board so I wouldn't lose it!

I really only need a finished woven length of 29 inches, but that made the colour progression far too slow. I would have only gone through three or four colours before I arrived at the full 14 inch width I was aiming for. So I lengthened my measuring path to a full 6 yards, LOL. My plan is to weave the whole thing off and then decide what section I want to keep for the banner. The rest will likely become part of some sewing project or another at some time. This is feltable wool, so that might be an option too.

Subscribe to:
Posts (Atom)