Translate

Saturday, July 30, 2016

The Whole 5 Yards

The "8/2 Blues" warp, after wet finishing, is 41cm by 4.51 metres or 16 inches by 5 yards. 


Although at this point no plan is carved in stone, I am considering the possibility of making most of this into a window valance for my guest room. 


Both ends are fringed. I do this so that the ends are secure during the finishing process and so that I have the maximum versatility in how I use the finished fabric.


If I do decide to go ahead with the valance idea I will use both fringed ends to make a matching cushion cover for the bed in the room.


And then I would add a header (hidden behind the handwoven cloth) of commercial fabric to serve as a pocket for a curtain rod.


The loom is not yet redressed. I'm taking a breather while I get other items ready for entry in our fall fair.


Tuesday, July 26, 2016

Fiber Arts with Kids

A while back (shamefully long ago) I received, for review, a book by Laurie Carlson. It's full of great little fibre arts projects to create and explore with kids age 9 and up.


My initial response was very favourable. There are fun sections on spinning, dyeing, weaving, knitting, crochet, and braiding. It wasn't long and I had chosen a project to do with my 9 year old granddaughter.

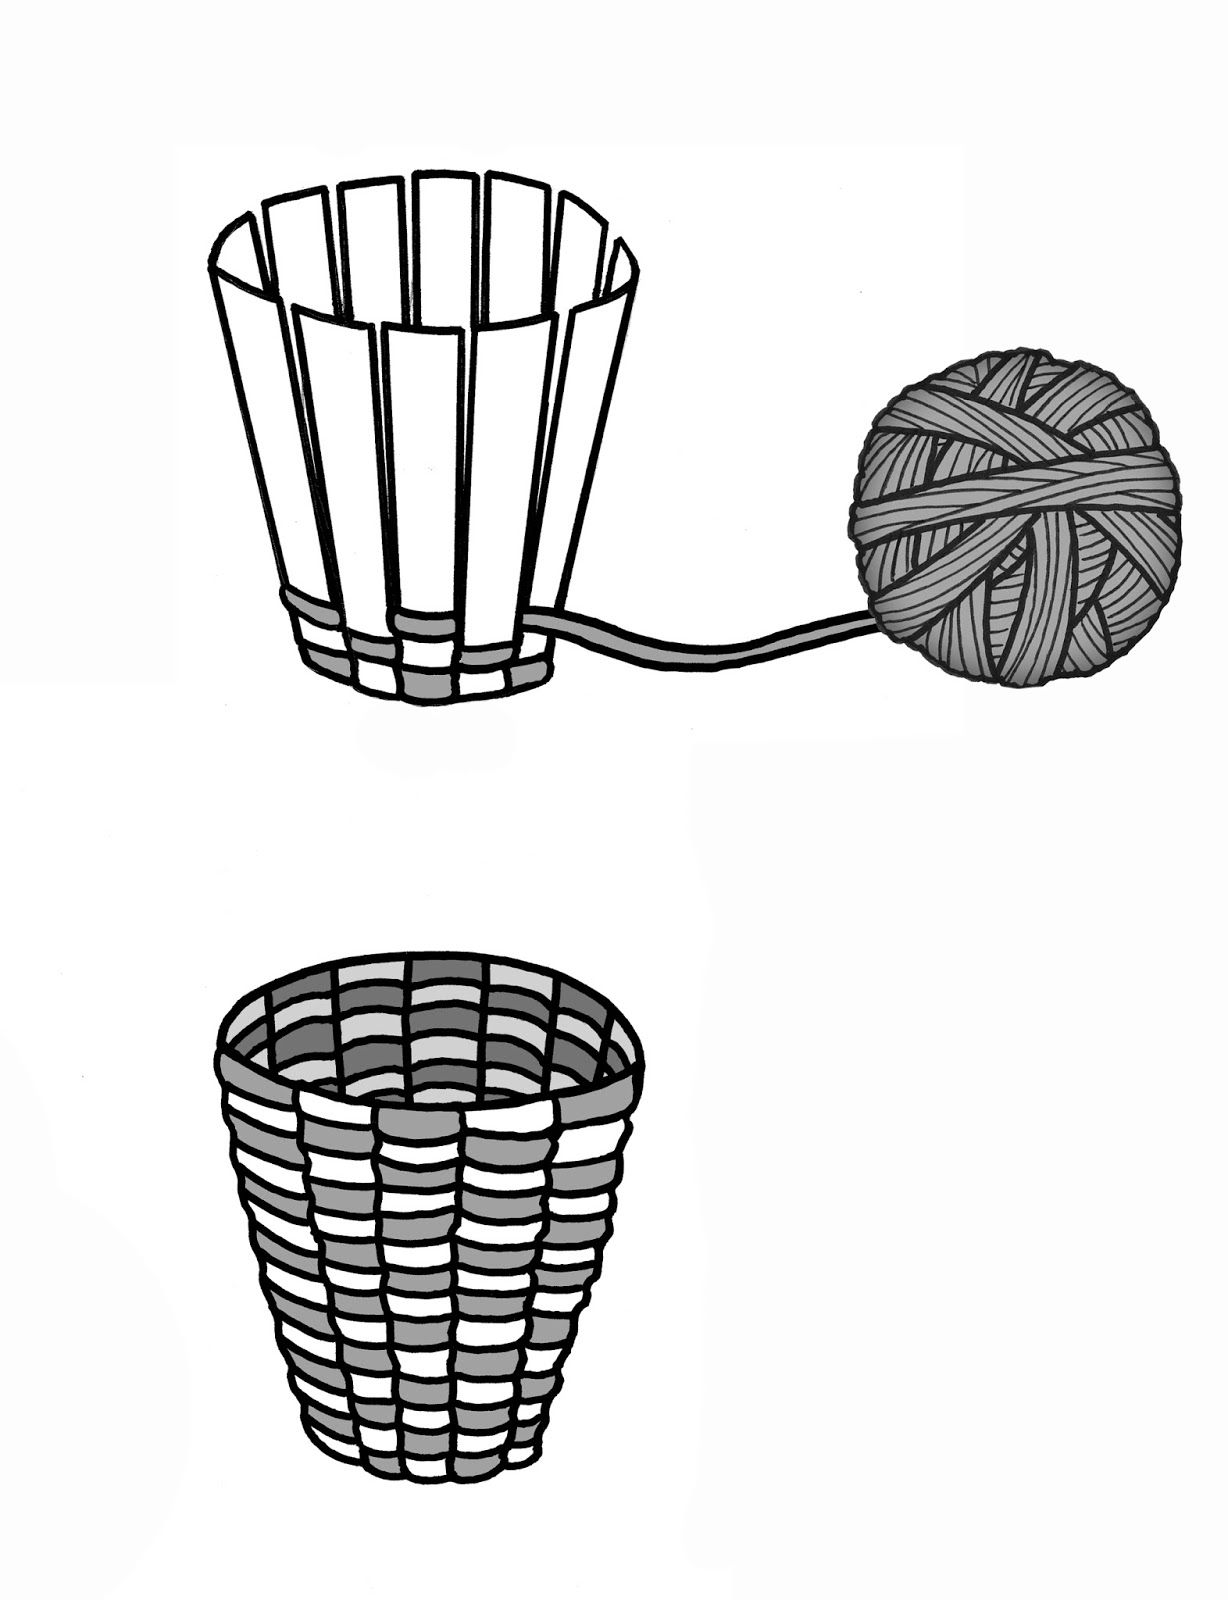
She had great fun creating what was meant to be a woven cup basket. I don't think she ever fully finished it though. The instructions for finishing it off were a little vague. And with this we come to one of the difficulties with this publication.


There has been an attempt in this book to cover numerous different crafts. Even though it is a substantial book of 148 pages that is not nearly enough to adequately teach that many crafts! For instance there are only 6 pages dedicated to learning the rather intricate craft of knitting. Of those six pages one is a description of how to make your own knitting needles. More space is taken up by a paragraph or two of knitting history. I'm a very experienced knitter and I can tell you that I never could have learned to knit with the vague, brief instructions written here. I don't think any adult could, let alone a child. The same brief coverage is seen for all of the other projects, and yet ---- 6 pages of text were used to describe various fibres.


The other problem I see is the lack of child appeal in the way the projects are presented. The only colour is seen on the cover. All of the projects within the pages are represented by simple, black and white line drawings, as seen above. There is no wow factor to draw a child in! Let's face it, books and crafts have some pretty tough competition these days! Kids have the world of the internet, television, and video games at their fingertips. A wall of text and simple, colourless line drawings just cannot compete. Even the 2 pages dedicated to the colour wheel are done in very boring to the eye black and white line drawings. 

Does this mean I think the book is a total loss? No. There are plenty of simple projects to keep a child busy during those long summer months --- if you can pull them away from the technological distractions long enough to engage them in using their hands to create something. Don't expect to hand an enthusiastic child the book and have them learn a craft on their own though. There will definitely have to be lots of additional instruction given by an adult already experienced with each craft, and for most of the crafts, access to supplemental material, such as YouTube's instructional videos. 

I don't recommend this book for the target group, which is supposed to be children ages 9 and up. I would, however, give a guarded approval of the publication as a resource for adults interested in teaching children fibre arts. As a source for small project ideas to create with children it has merit. I could see camp councilors and youth group leaders keeping it as an inspiration and reference book. 


Saturday, July 23, 2016

Saucy!

Made a couple batches of applesauce this afternoon. The dark one has had sugar and spices added. It's for serving with pancakes tonight.

Vats of homemade applesauce.

The lighter one is still plain and very TART! I'll likely use that one in baking so I didn't want to alter it until I've decided what I'm doing with it. 

Thursday, July 21, 2016

Where Was I?

I had to check back through blog posts from last week to see which weaving photos had been posted before I was distracted and kept busy with baking and sewing. So here's an update on the weaving of the "8/2 Blues" warp.

July 8, 2016

A whole lot of wandering inlay has been going on!

Later on Friday

July 9, 2016

July 10, 2016

A lower angle.

This next one is probably my favourite bit.

July 11, 2016

The next section is where I experimented with allowing different layers of inlay to overlap and "get in each others way". Not something I'd likely repeat as I don't feel the effect is all that successful, but still, a fun experiment.

July 12, 2016

Colour is WAY off in the following photo.

July 18, 2016

I owe "sgray" from Ravelry a nod of thanks for the inspiration for this striped clasped weft section. Neat idea Sally!

clasped weft laid in stripes

I liked the effect I took another photo for you from a different angle.

striped clasped weft

And now I'm playing with stripes but allowing them to do a serpentine wander every now and then.

Stripes that wandered

The end of the warp is now in sight. I'm enjoying this last technique so maybe I'll continue on and get a section long enough for a cushion cover? Or perhaps the sleeves of a top? We'll see!

Stripes turned wandering inlay.

Wednesday, July 20, 2016

Runaround Bag

I’ve been sewing.


Runaround Bag


Fun little Runaround Bag sewn using a pattern from Craftsy (I’m not affiliated, link is for your convenience).

I purchased the pattern thinking it might work well in Saori fabric and I could sell a few in the guild’s Christmas Craft Fair, but if I’m to do that the pattern will require some reworking. After reading/making the pattern I see that the lower section, front and back, where I would put the handwoven fabric, is actually cut in one piece that, during a clever zipper installation technique, makes the lining at the same time. Obviously it would be ineffective, and a waste, to use handwoven fabric on the inside where it will not be seen. I’ll need to split that piece in half and add seam allowances if I want to try it with handwoven fabric.

The bag is a great size for my dog walks. It fits my iPhone (as a size reference an iPhone 5S fits laying sideways across the bottom no problem), house keys, and a bunch of “poo bags”. I could easily fit things like lipstick and a thin wallet in there too if I was going out for longer and didn’t want to take a full sized purse.

There shall be more.

Monday, July 18, 2016

Skipping Elevenses

There was a reward to all that work yesterday -- Second Breakfast of Apple Pie a la Mode!

Yummmy!

The pies turned out absolutely delicious! Tart and flavourful, not bland and overly sweet like the store bought ones.

Now I suppose in an effort to not be mistaken for a Hobbit I'll have to skip Elevenses? 

My son started to ask if there were any apples left that needed picking, then he glanced out the window.

So heavy with apples the branches are breaking.

Um. Yes, I'd say there are a few left. In fact I noticed two more broken branches. As the apples grow they are so heavy the branches are bending over to the point where they break. I guess we might as well cut those branches down since the apples won't ripen or grow any further now that the branches have broken.

More than a few pies left!


Sunday, July 17, 2016

We Have a Pie Tree

Not exactly "in the twinkling of an eye", and I think that little ditty was about cherry pie anyway, but yes, give me 3 long hours in the kitchen and I can "whip up" 4 delicious apple pies.

Our tree is loaded this year.

I began with a large bucket filled with apples from our apple tree. The tree has produced so well this year that apples are being forced off the branches because there is no room for them as their limb-mates also grow. The overburden branches are even breaking under their weight. 

We don't spray so many/most of the apples have little marks on them. People are so accustomed to perfect, blemish free commercially grown apples now that they would likely pass these by. They make excellent pie though. Right now, with them being a little under ripe, they taste a lot like Granny Smith Apples. Tart, just the way I like a pie. A person could add more sugar if that was not to their taste though. 

                         Apple Pie Assembly Line

I worked on these assembly line fashion. I made the first batch of pastry and created four "bottoms", stirred together 4 individual batches of sugar and spices, then got the pastry for the tops ready. Once that was waiting I started on the apples.

                 Apple Parer Slicer Corer

Making 4 pies required a lot of apples! I counted 36 apple cores when I was done. I was very glad to have this little gizmo. It's an "Apple Parer Slicer Corer" and it was a gift from my mother when we moved into this house 26 years ago. You push an apple onto it's prongs and then crank the handle. The apple is peeled, cored, and sliced all in one quick motion.

3 hours later

Even with the apple peeling gadget, making four pies still took about 3 hours. By the time the mess was cleaned up and the pies were out of the oven I was too tired to cook dinner and we went out. We did come home to a delicious dessert of warm, tart, apple pie with ice-cream though. It was delicious! So much more flavour than those bland store bought pies, or even ones made with canned pie filling.

Friday, July 08, 2016

Off to a Good Start

After scrapping that failed, fuzzy blue-violet and chartreuse warp, I've wound another warp and this one is much proving to be much more successful!

Next warp

The warp is all cotton and the colours chosen were inspired by the ball of dishcloth cotton you see in the centre. The white, green, and light blue are not in the warp but may end up included as weft. 

Kona supervising the beaming of the warp.

Kona was a patient supervisor of the beaming process, though she chose to lay right where I would have to step over her every time I went from the front of the loom to the back. Using the "yank and crank" method of keeping a uniform tension I was stepping over her a LOT. 

Inlay over stripes

I put this warp on my loom so that it wouldn't be empty when a visitor interested in Saori weaving comes by. But I find it a very pleasant warp to weave and cannot seem to stay away. I may end up using up all 6 metres of it before the guest arrives! 

truest colour representation

The colours are most accurate in this final photo. I have no idea what the final use will be of the yardage, but I certainly am enjoying weaving it. 

Sunday, July 03, 2016

Biased

Even though Saori garments usually do not receive any special seam finishing techniques, lining, or facings, I have decided to use bias binding on a Saori vest I am creating. I will use the binding to finish the edges of the armholes and outer edges, pulling them to the inside like a faux-facing, and also to bind the seams on the inside of the vest in a "Hong Kong finish".


Making bias binding.


I've only created handmade bias binding a couple of times so I had no idea how much fabric to start with to create all of the bias binding I will need for this task. Not wanting to run short I decided, with inexpensive fabric, it was best to overestimate and I started with one full meter.

Making bias binding.


Using this tutorial I ended up with 16 meters of 2 1/2" bias tape! Yup, pretty sure I'll have enough.