Translate

Showing posts with label shirt. Show all posts

Wednesday, August 29, 2018

Another Patti

I liked my first Patti Blouse made using a Paganoonoo pattern a lot so when I found three more coordinating men's shirts I decided to make another Patti.


I'm not as happy with this one even though I do like fabrics and the colours. 


The fabric in the main shirt, though a lovely peached finish, is heavier and stiffer. Combine that with my addition of larger lined front pockets and the shirt tends to stand away from the body in a less flattering way.


Ah well, it's super comfy and a nice chill chaser. We're finally getting some cooler weather and some much needed rain.


My own innovations to this version were a change to the front pockets and covering the front placket with fabric from one of the contrasting shirts. I also removed the collar, leaving only the collar stand, and covered it with fabric from both accent shirts, different on the inside than it is on the outside.

Friday, July 20, 2018

3 into 1 Upcycle

I'm quite pleased with this "upcycle" project. I used "The Patti Blouse" pattern by Paganoonoo as a starting point. The pattern gives details on how to take 3 men's shirts and remake them into one ladies' blouse with a high/low hem.


I added my own little touches like sashiko inspired hand stitching and button embellishments.


The pattern instructions detail a fun way of relocating the breast pocket from one cannibalized shirt so that it becomes a functional, larger pocket at hip level.


The designer, Michelle Paganini, suggests using the button bands, intact, buttons and all, from both of the additional shirts to add detail and interest to the final shirt.


While removing the breast pocket from the main shirt I had an "oops" with the seam ripper and created a very tiny hole. I covered it with a patch from the gingham shirt, embellished it with a running hand stitch design crossing both shirt fronts, and it became a "feature".


I love the high/low hem created by adding the back of one accent shirt to the back of the main shirt. The addition also adds more hip room to a place where men's shirts are quite narrow in relation to the shoulder width. 


This project went from the three men's shirts on the left, to the finished ladies' blouse on the right.

Success! Yay!

I have two more shirts (dark navy and an eye searing chartreuse green!) that will be receiving this treatment as well but first I must find a third, coordinating shirt.


Monday, March 26, 2018

Boro Progress

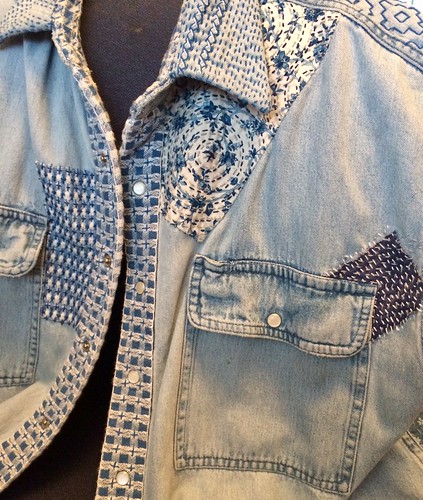
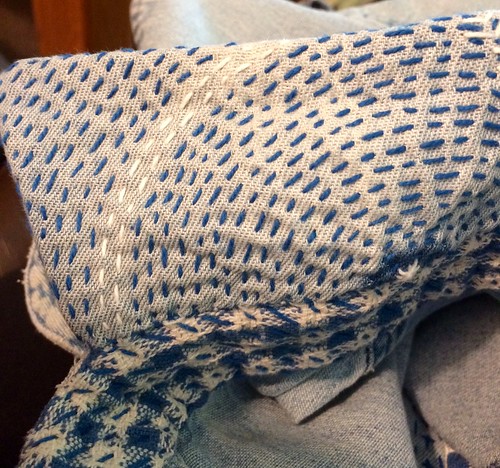
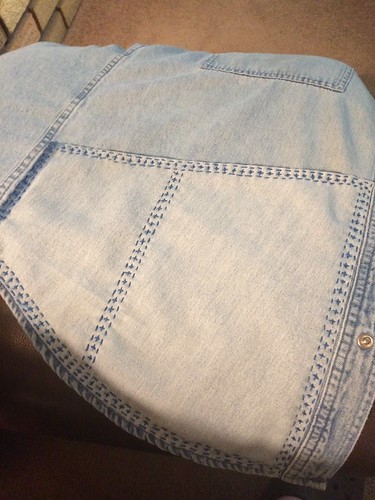
Looking back through previous blog posts I see that I started the work on this boro vest almost a year ago. Since the last update I've added many more patches and a whole lot of stitching to the front.


It's still not "complete". Some of the patches don't have their reinforcing stitching done.


And I have plans to eventually add patches to those lower pockets as well.


In the meantime I wear the vest almost daily, as an added layer as one would a favourite cardigan,


and that has added some wear to the front button band which, in the true boro style, now needs patches on its patches! I hope to keep repairing this garment as the need arises. I think it has an element of "wabi-sabi" to it. Quoting a Wikipedia's entry on wabi-sabi: "The aesthetic is sometimes described as one of beauty that is imperfect, impermanent, and incomplete."

Monday, October 16, 2017

For Your Safety!

Part of my clutter clearing in my crafting spaces has been picking up projects that have been on hold for some time and working on them. I figure the very act of making some progress on them should clear some of the stuck energy.

In the last few days I've added a couple of textile hobby related quotes to my crafting apron, which is a l-o-n-g term project. I still need ideas for getting knitting, crocheting, and spinning represented.


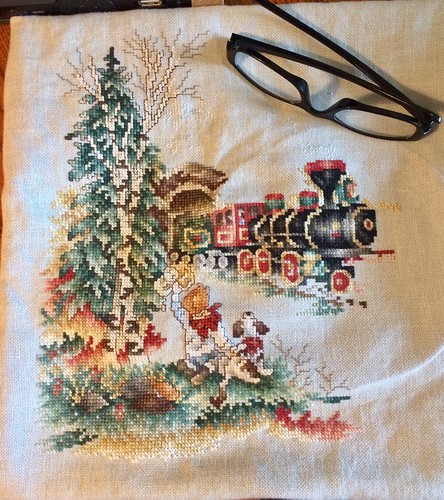
I work on my cross-stitch picture for about an hour every morning while I have my coffee. It's a large picture with lots of colour changes and it's done on 28 count linen. Progress is very, very slow.

October 16, 2017

I've added to my Sashiko/Boro vest.

Boro/Sashiko

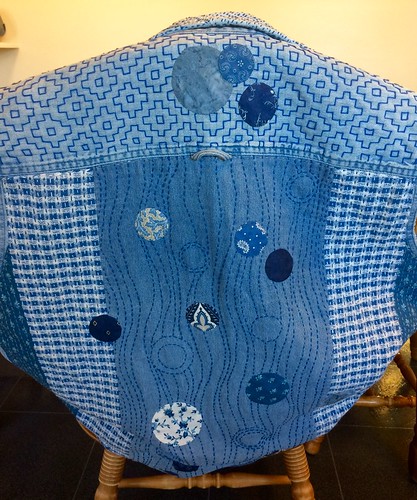
The back is sort of finished for now. I say "sort of" because the intent is for this to be a perpetual project. I'll be adding patches and further embellishment in the Boro style, over the years, as the garment wears and needs further patching.

I've now moved on to the front where I've added a few patches (legitimate ones, over holes and very worn sections of the original shirt),

A little progress on the front.

and a whole lot of stitching.

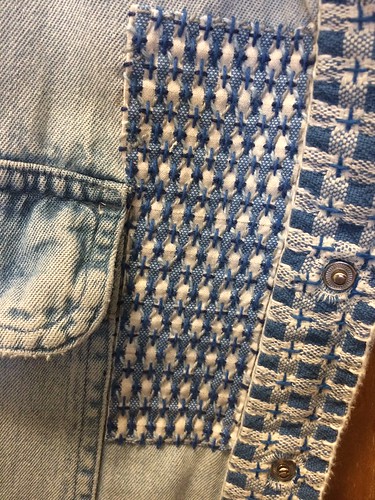
Sashiko. Komezashi (rice stitch)

The vest is so comfy that between each addition I try to keep it wearable as is.

Tuesday, May 30, 2017

Inspired by Boro

"Boro" is perpetual mending and patching that can extend the life of a garment indefinitely.  The technique originated in rural Japan. "Sashiko" is a form of Japanese folk embroidery that uses a basic running stitch to create a patterned background.

Collar and collar stand

Inspired by examples of boro and sashiko online, I've started a very long term boro/sashiko inspired project. Only "inspired by" because true boro was born of necessity, to extend the life of expensive cotton textiles and sashiko has rules I don't intend to follow strictly and a uniformity I am not yet able to achieve. This is just for fun and to create a comfortable, functional, and one of a kind garment for myself. 

My husband had a denim shirt hanging in his closet that was worn beyond the point of being wearable for anything other than painting and messy household chores. In fact, it has a few paint and spackle stains that I'll eventually cover with patches!


Boro shirt beginning.

I started by removing the sleeves since they were far too long for me anyway. I then used the fabric salvaged from the sleeves to fashion large, functional pockets along the lower edge of the shirt. The narrower pocket, close to the hip, is just the right size to hold my cellphone. Another just like it on the other side of the shirt will be handy for my reading glasses.
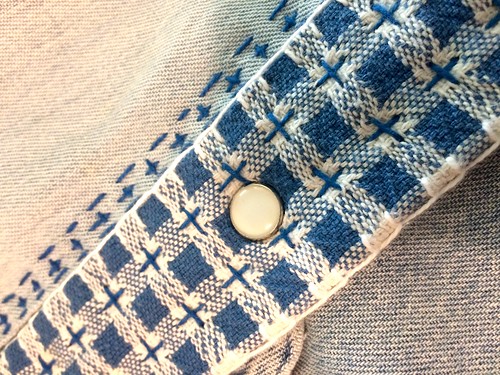
Working around the snaps of the Boro vest.

I then started in replacing the very worn areas of the collar stand and front button band with material repurposed from an old dish towel. With the addition of boro embroidery to hold the layers together and add an element of decoration, I quite like the way it looks. 

Of course covering the button bands with material also covered up the snaps, which I wanted to remain functional. It wasn't too difficult to snip tiny holes in the patching material and stretch it over the snaps, tucking the ends into a slim groove in the snap itself. Well -- it worked for both the top and the bottom of the "female" end of the snap anyway.
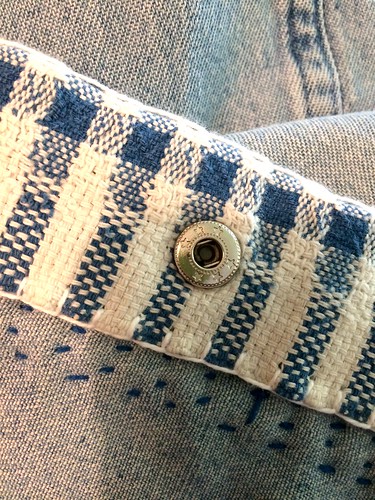
Working around the snaps of the Boro vest.

Uncovering the "male" portion of the snap was considerably more difficult because there was no groove to hide loose ends in. After some experimenting I ended up snipping a larger hole, turning the ends under, and stitching all around with a blanket stitch. Not as neat, but at least functional. That side won't be visible when the vest is worn anyway.
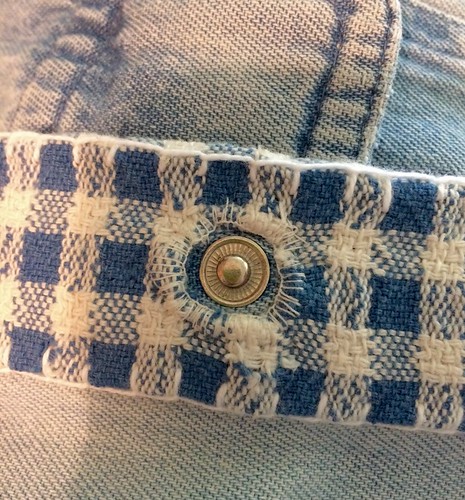
Working around the snaps of the Boro vest.

You'll be hearing more about this project in the weeks, months, and perhaps years to come. Once I get the initial patching and embroidery done I'll be wearing this vest a lot, perhaps only in the house, but maybe for walking the dog or camping as well. As the vest gets worn out further I'll just keep patching it!