Translate

Showing posts with label vest. Show all posts

Thursday, February 17, 2022

Diagonal Shell

This "Diagonal Shell" vest has been completed for quite some time. I started it back in November after years of being intrigued by this particular design. It's worked diagonally from one hip across to the opposite shoulder, front and back worked separately. That diagonal stitch pattern creates a really nice drape to the fabric. 


Sorry for the very dark photos, they were taken on a gloomy day and I haven't gotten around to taking better ones. This next photo shows the colour a little better. It really is quite pretty, with diagonal ribbons of colour that are ever changing.


The edging is a crocheted "crab stitch" which gives a delicate picot looking textured finish.


This is a pattern I may make again some day. I purchased yarn for this one, but it would also work up nicely for a destashing of little bits of this and that.


Tuesday, February 15, 2022

Barnstaple Vest

From the great long blogging break that I have taken you would think I hadn't done anything at all creative in a long time, but that isn't the case. During the 2 hour breaks I get each morning while the puppy, Teddy, goes down for a nap, I have been able to accomplish quite a bit. This new vest is a recent finished project.


It's the "Barnstaple Vest", pattern by Sandi Rosner.


The fit is perfect and I'm very happy with the way it turned out.


I respaced the buttonholes. I have 5 buttons with 12 stitches between each buttonhole rather than the 7 buttons with 8 stitches between each buttonhole as suggested in the pattern. I find fewer buttons, placed farther apart a more pleasing look.


Since my last post in November I have been working on several other projects, some are finished, some are still works in progress. More on that over the next few days -- if my blogging ompf holds out and Teddy-pup gives me a few moments to myself.

Monday, March 26, 2018

Boro Progress

Looking back through previous blog posts I see that I started the work on this boro vest almost a year ago. Since the last update I've added many more patches and a whole lot of stitching to the front.


It's still not "complete". Some of the patches don't have their reinforcing stitching done.


And I have plans to eventually add patches to those lower pockets as well.


In the meantime I wear the vest almost daily, as an added layer as one would a favourite cardigan,


and that has added some wear to the front button band which, in the true boro style, now needs patches on its patches! I hope to keep repairing this garment as the need arises. I think it has an element of "wabi-sabi" to it. Quoting a Wikipedia's entry on wabi-sabi: "The aesthetic is sometimes described as one of beauty that is imperfect, impermanent, and incomplete."

Monday, October 16, 2017

For Your Safety!

Part of my clutter clearing in my crafting spaces has been picking up projects that have been on hold for some time and working on them. I figure the very act of making some progress on them should clear some of the stuck energy.

In the last few days I've added a couple of textile hobby related quotes to my crafting apron, which is a l-o-n-g term project. I still need ideas for getting knitting, crocheting, and spinning represented.


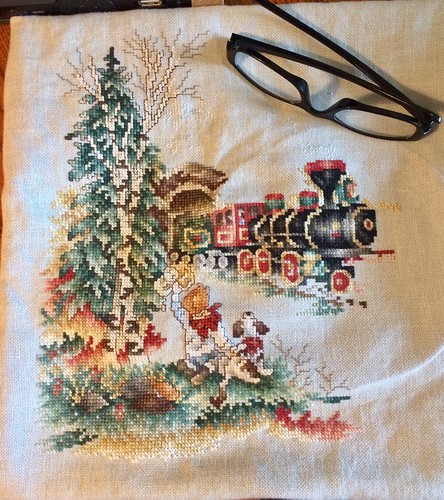
I work on my cross-stitch picture for about an hour every morning while I have my coffee. It's a large picture with lots of colour changes and it's done on 28 count linen. Progress is very, very slow.

October 16, 2017

I've added to my Sashiko/Boro vest.

Boro/Sashiko

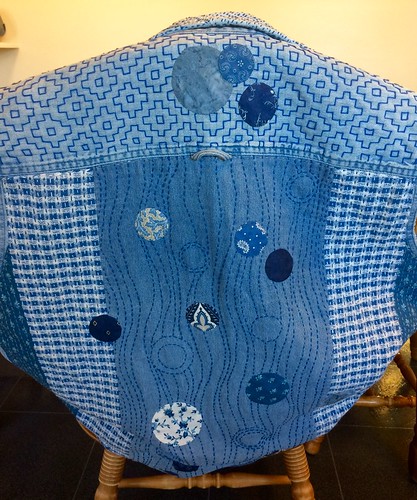
The back is sort of finished for now. I say "sort of" because the intent is for this to be a perpetual project. I'll be adding patches and further embellishment in the Boro style, over the years, as the garment wears and needs further patching.

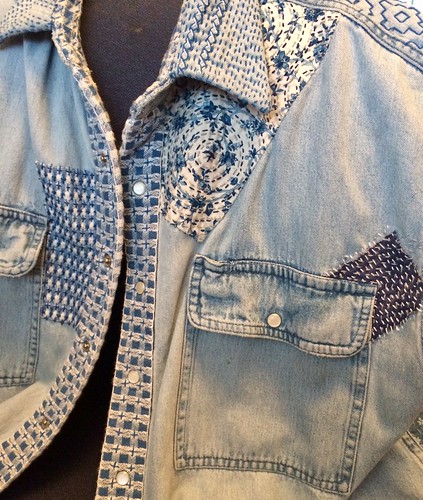
I've now moved on to the front where I've added a few patches (legitimate ones, over holes and very worn sections of the original shirt),

A little progress on the front.

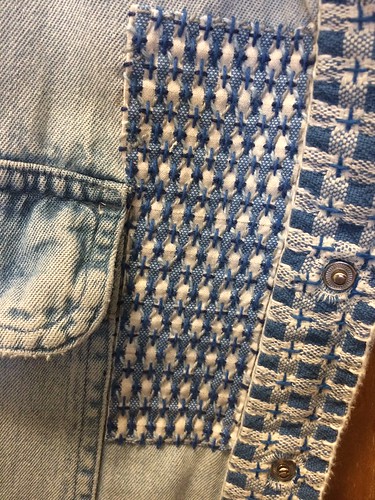
and a whole lot of stitching.

Sashiko. Komezashi (rice stitch)

The vest is so comfy that between each addition I try to keep it wearable as is.

Friday, June 09, 2017

Love That Internet

I have a love/hate relationship with the Internet. Sometimes it seems to be the biggest time thief ever, hours from one's day missing and little to show for it. Let's face it, none of us are getting any younger! Knowing that, I like to make every moment count, and time spent chasing useless Facebook side links is not what I want to see when I look back on the moments of my life!


On the other hand, the Internet can be a wonderful, handy, economical teacher, accessible at any hour of any day, and right when you need it. For instance, when I decided to use circles as design elements on the back of my denim Boro/Sashiko vest, I realized I had barely any experience with applique, and no experience at all with how to get a really nice, smooth edge on a circular applique. 

Enter the Internet wonder world of YouTube instructional videos. Pretty much anything you want to learn can be found on YouTube videos. Not just one instructor or method, but many to choose from. I watched several and finally decided that the one I've embedded here would be the one I used. It seemed to be just the right fit for me. It appealed to the perfectionist in me and yet skipped the tedious hand gathering stitches of some of the other methods.


The loose pile of circles pictured above was a photo taken several days ago. I've now selected the ones I'm going to use, have appliqued them to the centre back panel, and I'm well on my way to stitching the background in a Sashiko inspired manner. More photos of that when that section is complete.

Sunday, May 28, 2017

Wha? I thought I - - -

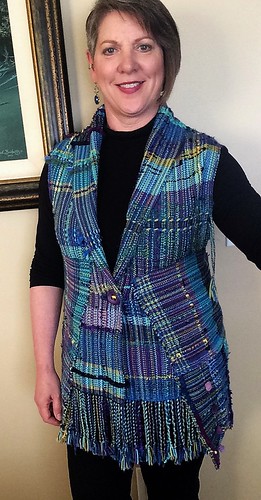
Pardon the confusion. I thought I had already posted an update on this. I guess it was just one of those posts I had taken photos for, thought about, but never actually wrote? The vest I posted about nearly two weeks ago now has a button.

Saori Vest, buttoned

I like it better this way. It bothers me when vest/coat/cardigan edges flop about when I'm walking. Having it buttoned also gives the vest more shape.


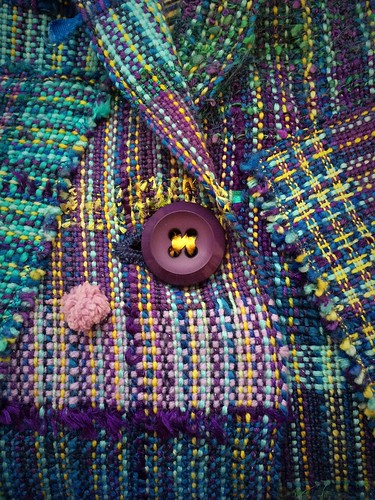
Button and button hole

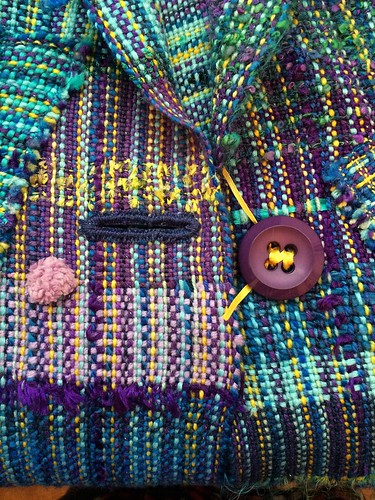
So here's the buttonhole. I ended up ironing fusible interfacing to the backside of the fabric and then I made a machine sewn, corded buttonhole. Against the busy handwoven fabric it seemed to need more ompf so I decided to create a tatted piece to go around it. That looked too much like a second thought so, using the same cotton weaving thread I used in the tatting, I hand embroidered buttonhole stitch over the opening and the tatted edging.

Buttoned

Saori Vest, buttoned

I've really been on a roll with various forms of fibre art these past few weeks. Of course that also means I've spent less time online, which in turn results in less participation on forums and nothing in the way of blog posts. 

Saori Vest, buttoned

I have plenty of blog fodder. I hope to get at least a few posts up in the next few days. 

Monday, May 15, 2017

Unusual Construction

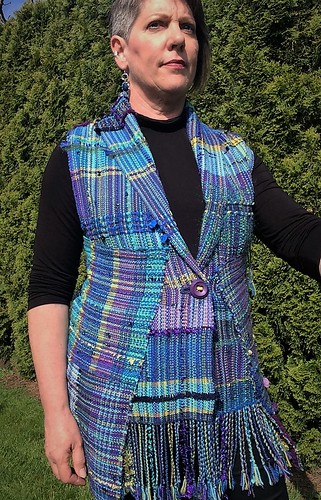
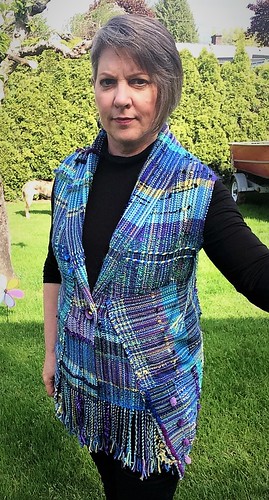
I took that weaving I wasn't too happy with and made a vest I actually like!


It's unusual construction started with some notes posted by Sally Gray, a fellow Saori weaver  on a Raverly forum.


My handwoven fabric wasn't of the same dimensions as hers so I had to tweak the idea to work with what I had available.


The fit is good and the vest is very comfortable to wear.


I'll be shopping for a large focal button to close the front though, as I think it will look better that way.


Tuesday, August 23, 2016

Late Exhibition Report

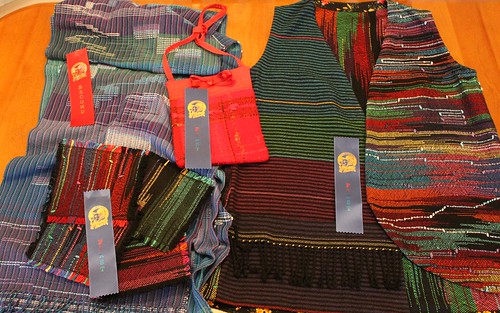
Just realized that I never did report back to my readers about my Chilliwack Exhibition entries for this year. Enough time has passed that I can barely remember what I entered let alone how each entry did! (Why yes, I DO have a very short memory!) I do recall that I entered 6 items and all 6 got some sort of ribbon. No rosettes this year, but lets see if I can search Flickr files to see what was entered and which ribbons were won for each category.

Oh. This photo is somewhat helpful. It at least shows the ribbons won in the weaving department.

4 entries and 4 ribbons

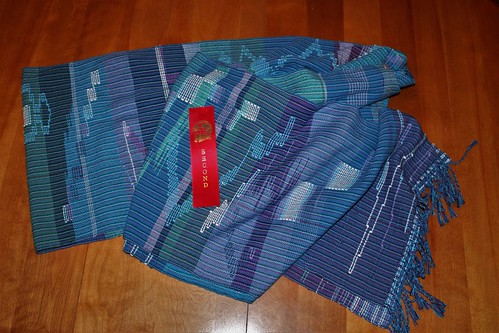
A second for my Saori "8/2 Blues" yardage.

Hand woven yardage

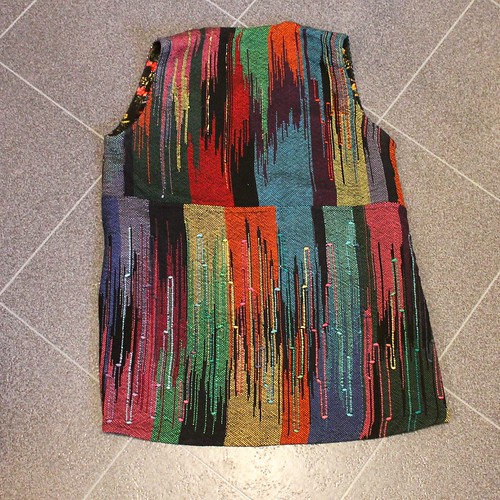
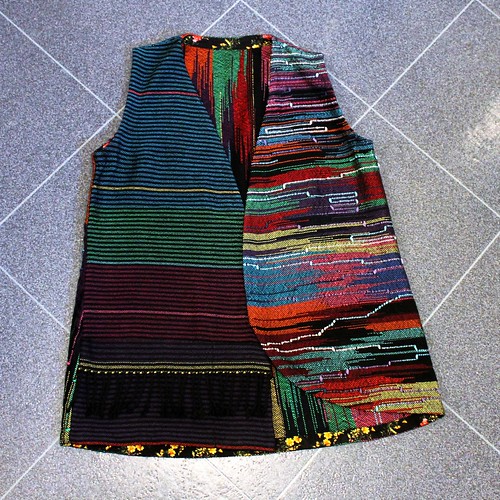
A first place ribbon for my Saori vest,

Hand woven garment
Hand woven garment

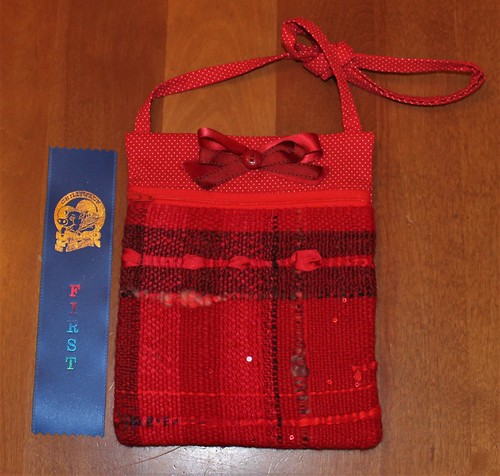
Another first for the little red cross-body bag with its handwoven Saori fabric.

Hand woven bag

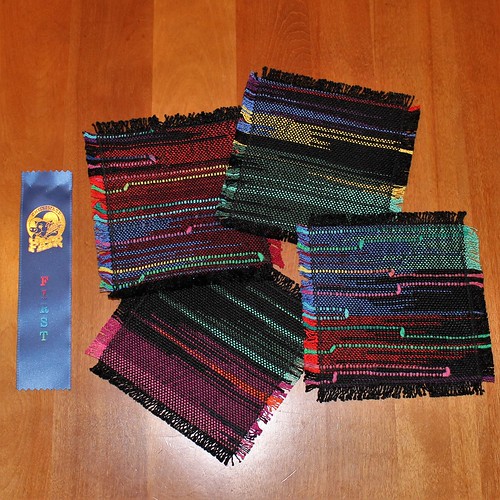
The Saori woven coasters also won a first. I'll be posting a bit of a tutorial tomorrow about how those were finished. Come back around if you are interested and haven't already found my explanation on Ravelry.

Hand woven "mug rugs"

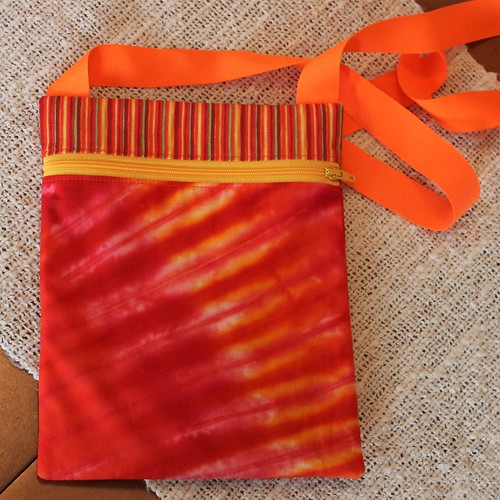
The other two ribbons were won in a different department. For sewing I received a third place ribbon on the orange Runaround Bag.

Runaround Bag

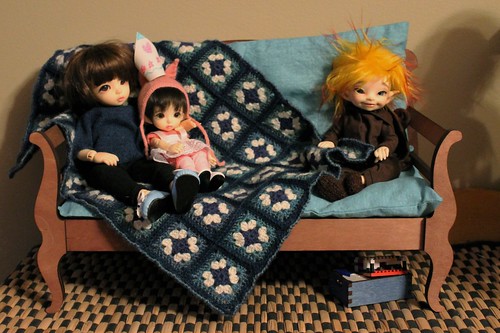
And finally, in crocheting, a first for the miniature 1/4 scale afghan I made for the doll couch. 

Minifee Couch

So there you go, the 6 ribbons won at this year's Chilliwack Exhibition, though I neglected to get photos of the ribbons with those last two projects.

Sunday, June 07, 2015

A Little Lace

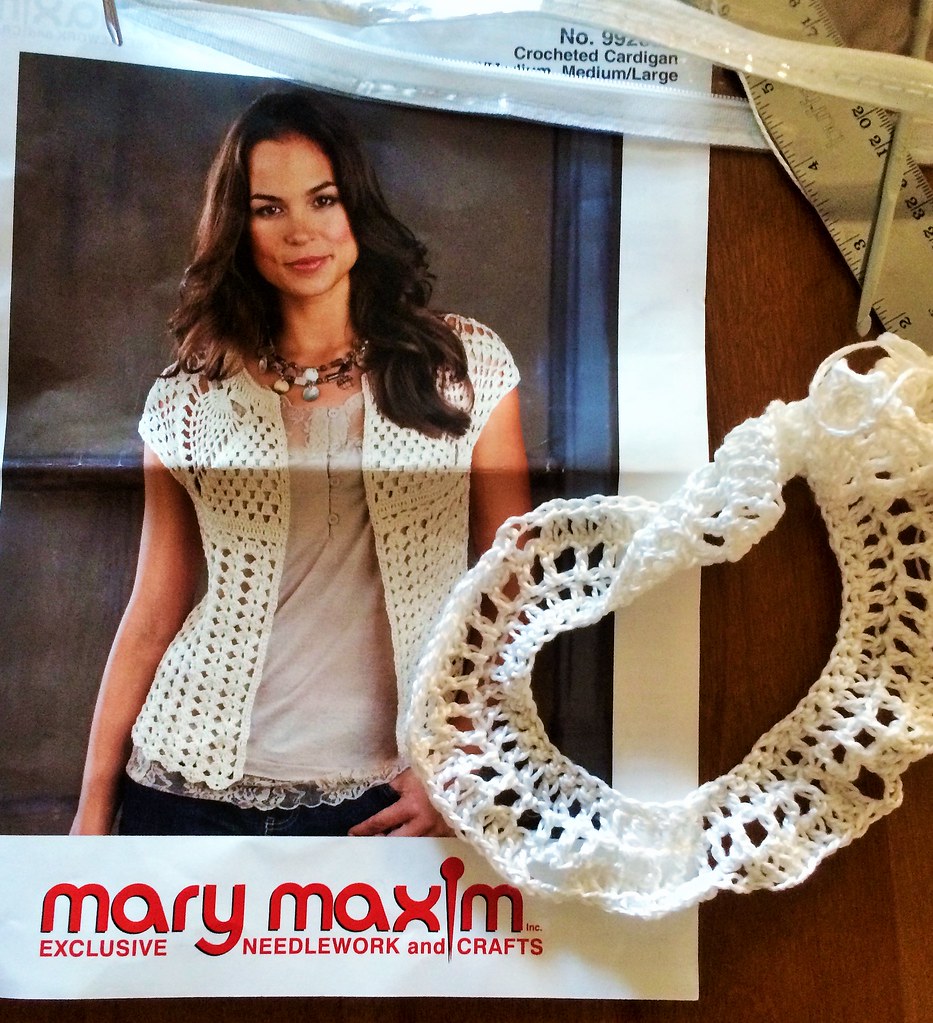
I've been seeing a lot of summer over-blouses in stores these days. The sheer or lace tops are modeled over simple tanks and camisoles. Perhaps now is a good time to crochet a little vest by Mary Maxim?

New project

I'm making it for myself, from the Mary Maxim kit which includes a 1 pound cone of sport-weight cotton, but I'm hoping that after I have worked the pattern once, and understand the construction, I'll be able to down size it for Elfonda, my Fairyland Minifee. That would likely require using a tiny hook and sewing thread.

Monday, July 21, 2008

Masters Monday - 2.25

DONE!

I've finished the vest for my second level of the Master Knitters' certification.

I chose this Plymouth yarns pattern as a basis for my vest. I even purchased the pattern, but then found that my chosen yarn was not a good match even though the stated gauge on the ball band claimed it would be. I ended up completely reworking the pattern with Sweater Wizard software so that I could use the basic style of the vest but with my own gauge.

I finished the button band yesterday and did the long, long stretch of tubular cast off today. That done, I sewed in all the ends and then headed out for matching buttons. She's complete and I love her......except for one little annoying detail......the collar seems odd to me. It is really tall and left as is it won't lay nicely.

BUT, all is not lost. When I fold the collar once to the inside it lies nicely, like it was made to be worn that way. It's warm and snuggly.


Of course it's summer here right now and the weather has been beautiful. Much too nice to be wearing an extra warm vest. That's actually a good thing. I won't be tempted to wear it before I have a chance to hand it in for evaluation.

Monday, July 14, 2008

Masters Monday - 2.24

It's been a very busy week! I had hoped that I would have the finished vest to show this week, but I just didn't have the time. I did get most of the collar done though.

That is a whole lot of ribbing! 14 inches of it with short row turns at the ends of each row.

I'm finished the actual collar section so the short rows are behind me. Six more full length rows remain, each of these going from the bottom of one front edge all the way around the collar and back down to the bottom of the other side. Long, long rows with five buttonholes that need to be evenly spaced. I'm still working out what the exact spacing needs to be.

In preparation for that spacing I knit Swatch 20 last week, which focuses on spacing buttonholes evenly. I still have to sew in the ends and tag this swatch.

The remainder of this week was caught up in a whirlwind of activity. Besides babysitting our granddaughter, shopping for a new fridge, and doing some sewing for a gift that needed to be mailed, I spent the better part of weekend with the Chilliwack Spinners and Weavers Guild at Minter Gardens. The first day I spent combing wool. Although I would have liked to continue with that on the second day, it's tiring work and my shoulder had had enough. I switched to spinning for the second day.


Our location was shady and comfortable on an otherwise hot day. We were part way up a beautiful meandering path through a serene section of the gardens. The small brook behind us provided peaceful background music (in between the more rowdy jazz numbers performed closer to the gates).

I did find the time to walk around and take a few pictures. The big attraction at the gardens on Sunday was the Car Show. Hundreds of unique cars nestled into a scenic background.


It was a lovely weekend. I was very glad to hear that the guild has been invited back to demo again next year.

Monday, July 07, 2008

Masters Monday - 2.23

Although it may have seemed like I neglected working on my Master Knitters project last week, I actually did do a bit, but I never had time to blog about it. So today we have a 2 for 1 feature.....two weeks of Master Knitter, Level II progress in one post.

In the first week I struggled mightily to do the side seams. I ripped those seams out so many times that I frayed the length of yarn used for seaming.....twice. I kept having troubles with the mattress stitch going astray and being off by a half stitch.

Eventually I made sure I had it all lined up first by basting it loosely at the obvious design elements using a smooth crochet cotton. After that the seaming was easier and when I was done the smooth cotton was easy to remove, although I had to pull it out one stitch at a time.

I'm not completely happy with the seam. The pattern all lines up perfectly, but the 2 knit stitches that are seamed together are kind of flattened looking compared to the other ridges. For the patterned section this was the best I could do. When I did my preliminary swatching I determined this was the best location within the stitch pattern for the seam. Otherwise I would be seaming a changing stitch arrangement which would be way harder! In "real life" knitting (as opposed to having to design according to the course requirements) I would have done this vest back and forth from front opening to front opening, eliminating the side seams all together.

Same sort of problem with the 1x1 ribbing seam. It looks flattened compared to the other columns of knit stitches. This was once again unavoidable if I wanted to use a tubular cast on. Ideally 1x1 rib would be seamed between a knit and a purl stitch so that the seam would be hidden "in the ditch", but tubular cast on results in an odd number of stitches making it necessary to seam the ribbing using half of the selvedge stitch on each side.

The remainder is THIS week's progress. I've seamed the shoulders using short row shaping and then a 3 needle bind off. I have also picked up the stitches around both armholes and knit the armhole bands ending in a tubular bind off.

I'm now working on the shawl collar. It will be a very deep, warm, neck hugging collar that is shaped with short rows and ends below the bust line. It is consuming alarming amounts of yarn!

If I don't run out of yarn I'll be back next week with photos of the finished vest.
What type of buttons do you think I should use?

Oh. Which reminds me. I also did one of the required buttonhole swatches this week. I wrote up the pattern and everything. I just have to make up it's tag. Photos of that next week too.