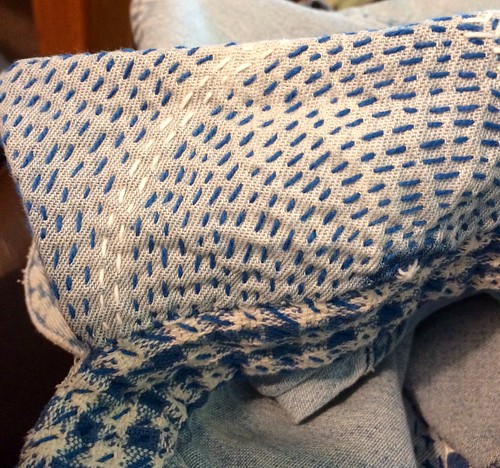
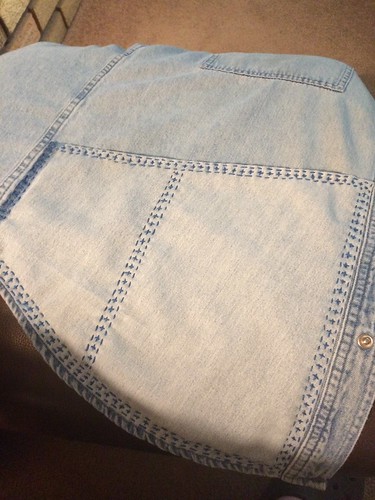
Translate

Showing posts with label denim. Show all posts

Monday, November 21, 2022

A Dozen or Just One?

Do a dozen hanging kitchen towels count as 12 finished projects, or just one?


I made these new ones up to replace some old very ratty and faded ones that have completely worn out. 


I love having a towel firmly attached to the handle of my oven. That way it doesn't "walk off" and it is always there when I need to quickly dry my hands.


Thursday, May 13, 2021

Denim Statement Piece

Here's another pendant made using the basic ideas gleaned during the "Make a Statement" multi-media course presented online by Gwenn Lafleur. This particular one is my version of the "medicine bag". It forms a pocket for whatever special trinkets a person might wish to carry. 


I made the base of mine from an Inkle band that had been woven on my Saori CH60 floor loom for another purpose, but it turned out too wide. I repurposed it, and through some folding, fashioned it into an open pocket on the back. To form a "bezel" for the top of the pendant I folded the fabric over a plastic straw creating a reinforced casing. A tubular Inkle band, created on my Windhaven Ukulele Inkle Loom, passes through the straw in the casing. 

Both Inkle bands made use of weaving cotton given to me by a friend when she was moving to a new community. I believe it was originally part of the stash of another mutual friend and former guild member. In fact, all components of the pendant have special meaning to me.


All three of the buttons used came from a huge button jar that originally belonged to my grandmother and was handed down to my mother, and now to me. The buttons themselves may or may not be old since each of us has added to the collection over the years.


The pale blue lace surrounding the stacked buttons is a scrap leftover from making tiny doll clothing, another hobby of mine.

The frayed denim at the bottom edge is the hem of a discarded pair of my husband's jeans.


The large silver beads along the top, just below the casing, are from a broken necklace. Those beads are nestled into a small piece of tatting that I did years ago while learning shuttle tatting.

The thin blue fabric with white polka dots in the upper right corner is an ancient old, completely worn to tatters, handkerchief that belonged to my husband and perhaps might have originally been my dad's?


The little silver dragonfly was a gift from a friend that knows I have a special affection for dragonflies.

The small dark blue beads scattered beside the dragonfly are leftovers from an intricate beaded shawl that took many months to knit.

Arching down the left side is a piece of an heirloom crocheted doily. It was stained and there were holes in it so it had just been tucked away, unused. I'm hoping this use is more honoring of the original craftswoman.

The embroidery embellishing the fabric that runs diagonally across the middle of the piece was done using floss inherited from my mother.

I'm very pleased with this pendant. I think I'll wear it a lot, denim being such a wardrobe staple. 

Tuesday, February 02, 2021

Sandhill Sling

 It took awhile, with all the patches and boro like hand stitching, but my Sandhill Sling is finally finished.


I hope to use this small cross-body back pack on dog walks and when hunting for rocks for my mandala paintings. 


It has an outside zippered pocket, the main zippered interior, and an elasticized inside slip pocket.


This is the only construction photo I remembered to take. 


For the most part it wasn't difficult, but there were some "challenging" bits so I wouldn't recommend it for a beginning sewist.

I do intend to make another, possibly for shopping, and for that one I will combine both of the pattern views into one. I'll put the optional snap pocket on the side facing away from the body with the idea of keeping my cell phone there. Then on the side that lies snug against my body I'll put the zippered pocket for more secure storage of my wallet. Inside I'll put a slip pocket on both sides, for more organization. I may also put a D-ring on both sides of the bottom so the strap can be attached to either side. 


Monday, September 09, 2019

From His Closet

Another shirt taken over.


My husband wears denim shirts until they are stained or worn, but won't wear them with patches. At that point I happily take them over and refashion them into something I can, and will, use myself.

In general I'm happy with the oversized, comfortable, forgiving fit, but the sleeves are always way too long. In the past I've remedied the problem by completely removing the sleeves and making a boro vest. This time though the variable weather of fall has inspired me to leave the sleeves on. It makes for a great layering piece I can wear over summer tank tops when the weather decides to turn chilly.


I shortened the sleeves and added contrast cuffs using the tutorial in Paganoonoo's "Patti Blouse" pattern. I then used the original sleeve cuffs, snaps, pleats and all, as big, useful patch pockets. I always need somewhere to stuff my hands!


Hidden inside the left shirt front is an additional pocket, this one for my cell phone. 


I've covered a couple of paint stains with patches which have been embellished with sashiko stitching.


One stain is covered with a big "Judy" flower, tutorial also in the "Patti Blouse" pattern linked to above. The flower is attached with it's brooch pin. Some time in the future I may decide to replace it with an ordinary patch.


The collar of the shirt was worn and fraying so I covered it with fabric that matches the new cuffs.


I receive no compensation for the links I include in my blog. They are only there for your research convenience.

Monday, April 29, 2019

Testing Testing

A peek or two at what I'm working on now.

The weaving was done quite some time ago, years perhaps. It's denim strips woven alternately with picks of an indigo dyed cotton yarn.


With the ANWG Conference (Association of North West Weaver's Guilds) coming up in June I've decided to make something of the fabric and submit it for exhibition. No guarantee that it will be accepted of course, but nothing ventured, nothing gained, right?


These photos are just teasers. Some experimenting, trial and error and testing of ideas is going on.


The above is a testing muslin for a bound pocket. It's not perfect but I learned a few things I can carry over to the real project.

Friday, July 27, 2018

Could Be Better

Another remake, this one not as flattering, but still a functional garment. 

I took two of these denim dresses, picked up from a clearance rack, and remade them into one that worked better for my needs. 


I really liked the way the dresses felt on, but they were too long, lacked the large, useful pockets that I love, and had a horrible belt that made the dresses look like a pillow tied in the middle.


So I chopped the sleeves off of one of the dresses, and other than opening them up by making a vertical cut above the sleeve placket, I used them 'as is', buttons, pleats and all, to create large detailed pockets on the second dress. 


I also shortened the dress to become more of a tunic length for wearing with leggings.


The fit is loose and comfortable, not clingy.


And I love those extra large pockets!


The scraps left over from the remaining dress will be used in my boro/sashiko embroidery work. 

Friday, July 13, 2018

Upcycled Hat

A hat I like!


And it fits!


Other than the eyelets which I had to buy new, it's completely "upcycled" from old denim jeans.


I purposely left the edges exposed so that they would fray with repeated washing.


Did I mention that it FITS? I have a large head and can't buy ready made ladies hats. I made this one using the multi-sized "garden hat" pattern in the book, "Happy Hats and Cool Caps", which I picked up at "The Bookman", a used book store in town.


I'm very pleased with the end result. It is SO comfortable and provides protection from the glare of the sun on my long dog walks.


There may be others in the future. I'd like at least one more so I have something to wear when this one is in the wash.

Monday, March 26, 2018

Boro Progress

Looking back through previous blog posts I see that I started the work on this boro vest almost a year ago. Since the last update I've added many more patches and a whole lot of stitching to the front.


It's still not "complete". Some of the patches don't have their reinforcing stitching done.


And I have plans to eventually add patches to those lower pockets as well.


In the meantime I wear the vest almost daily, as an added layer as one would a favourite cardigan,


and that has added some wear to the front button band which, in the true boro style, now needs patches on its patches! I hope to keep repairing this garment as the need arises. I think it has an element of "wabi-sabi" to it. Quoting a Wikipedia's entry on wabi-sabi: "The aesthetic is sometimes described as one of beauty that is imperfect, impermanent, and incomplete."

Monday, October 16, 2017

For Your Safety!

Part of my clutter clearing in my crafting spaces has been picking up projects that have been on hold for some time and working on them. I figure the very act of making some progress on them should clear some of the stuck energy.

In the last few days I've added a couple of textile hobby related quotes to my crafting apron, which is a l-o-n-g term project. I still need ideas for getting knitting, crocheting, and spinning represented.


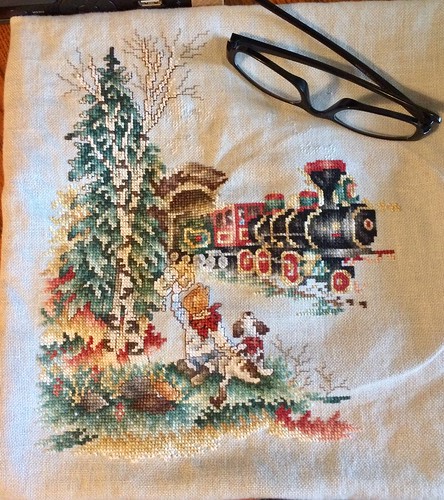
I work on my cross-stitch picture for about an hour every morning while I have my coffee. It's a large picture with lots of colour changes and it's done on 28 count linen. Progress is very, very slow.

October 16, 2017

I've added to my Sashiko/Boro vest.

Boro/Sashiko

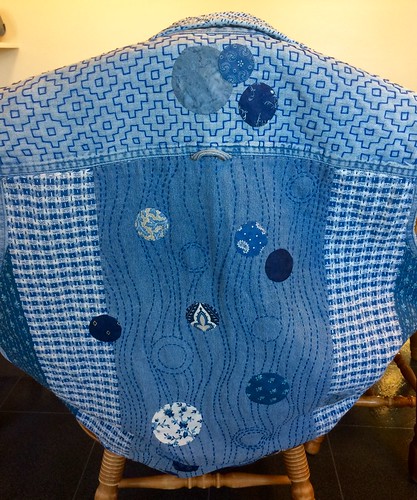
The back is sort of finished for now. I say "sort of" because the intent is for this to be a perpetual project. I'll be adding patches and further embellishment in the Boro style, over the years, as the garment wears and needs further patching.

I've now moved on to the front where I've added a few patches (legitimate ones, over holes and very worn sections of the original shirt),

A little progress on the front.

and a whole lot of stitching.

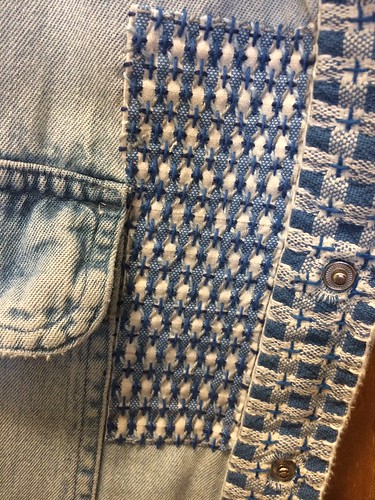
Sashiko. Komezashi (rice stitch)

The vest is so comfy that between each addition I try to keep it wearable as is.

Friday, June 09, 2017

Love That Internet

I have a love/hate relationship with the Internet. Sometimes it seems to be the biggest time thief ever, hours from one's day missing and little to show for it. Let's face it, none of us are getting any younger! Knowing that, I like to make every moment count, and time spent chasing useless Facebook side links is not what I want to see when I look back on the moments of my life!


On the other hand, the Internet can be a wonderful, handy, economical teacher, accessible at any hour of any day, and right when you need it. For instance, when I decided to use circles as design elements on the back of my denim Boro/Sashiko vest, I realized I had barely any experience with applique, and no experience at all with how to get a really nice, smooth edge on a circular applique. 

Enter the Internet wonder world of YouTube instructional videos. Pretty much anything you want to learn can be found on YouTube videos. Not just one instructor or method, but many to choose from. I watched several and finally decided that the one I've embedded here would be the one I used. It seemed to be just the right fit for me. It appealed to the perfectionist in me and yet skipped the tedious hand gathering stitches of some of the other methods.


The loose pile of circles pictured above was a photo taken several days ago. I've now selected the ones I'm going to use, have appliqued them to the centre back panel, and I'm well on my way to stitching the background in a Sashiko inspired manner. More photos of that when that section is complete.

Tuesday, May 30, 2017

Inspired by Boro

"Boro" is perpetual mending and patching that can extend the life of a garment indefinitely.  The technique originated in rural Japan. "Sashiko" is a form of Japanese folk embroidery that uses a basic running stitch to create a patterned background.

Collar and collar stand

Inspired by examples of boro and sashiko online, I've started a very long term boro/sashiko inspired project. Only "inspired by" because true boro was born of necessity, to extend the life of expensive cotton textiles and sashiko has rules I don't intend to follow strictly and a uniformity I am not yet able to achieve. This is just for fun and to create a comfortable, functional, and one of a kind garment for myself. 

My husband had a denim shirt hanging in his closet that was worn beyond the point of being wearable for anything other than painting and messy household chores. In fact, it has a few paint and spackle stains that I'll eventually cover with patches!


Boro shirt beginning.

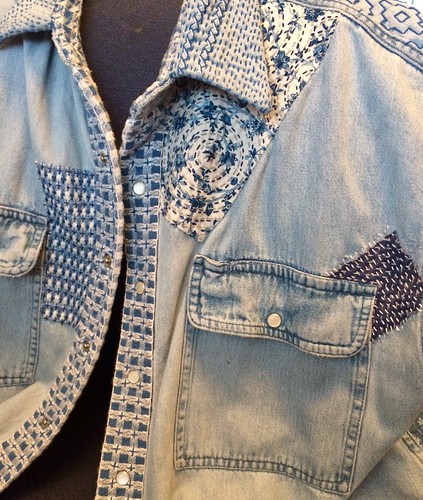
I started by removing the sleeves since they were far too long for me anyway. I then used the fabric salvaged from the sleeves to fashion large, functional pockets along the lower edge of the shirt. The narrower pocket, close to the hip, is just the right size to hold my cellphone. Another just like it on the other side of the shirt will be handy for my reading glasses.
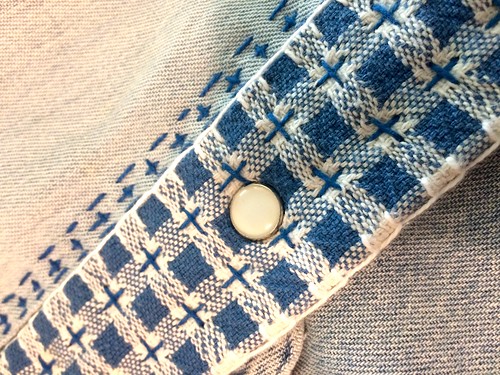
Working around the snaps of the Boro vest.

I then started in replacing the very worn areas of the collar stand and front button band with material repurposed from an old dish towel. With the addition of boro embroidery to hold the layers together and add an element of decoration, I quite like the way it looks. 

Of course covering the button bands with material also covered up the snaps, which I wanted to remain functional. It wasn't too difficult to snip tiny holes in the patching material and stretch it over the snaps, tucking the ends into a slim groove in the snap itself. Well -- it worked for both the top and the bottom of the "female" end of the snap anyway.
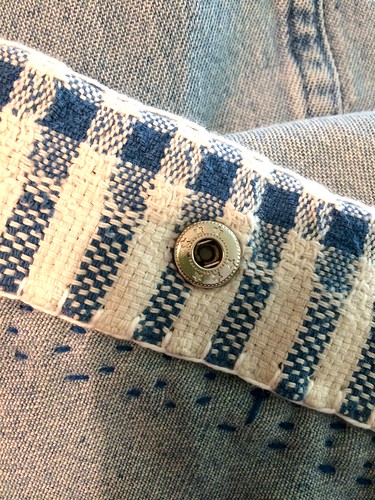
Working around the snaps of the Boro vest.

Uncovering the "male" portion of the snap was considerably more difficult because there was no groove to hide loose ends in. After some experimenting I ended up snipping a larger hole, turning the ends under, and stitching all around with a blanket stitch. Not as neat, but at least functional. That side won't be visible when the vest is worn anyway.
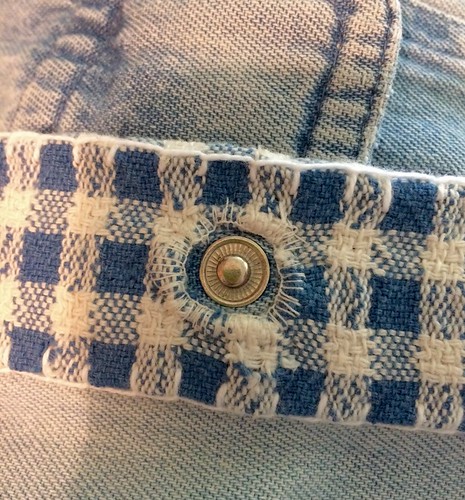
Working around the snaps of the Boro vest.

You'll be hearing more about this project in the weeks, months, and perhaps years to come. Once I get the initial patching and embroidery done I'll be wearing this vest a lot, perhaps only in the house, but maybe for walking the dog or camping as well. As the vest gets worn out further I'll just keep patching it!

Sunday, November 15, 2015

A Tiny Wardrobe

I spent some time this week sewing and knitting for the incoming Realfee Soso. After sending the Mari faceplate off to Sweden I have a female Realfee body here (19cm) and the Soso is intended to be a boy. That's okay though because I also have a male Realfee body and another Mari faceplate on order. When the Mari with a male body arrives she will trade bodies with the Soso so that I will have a male Soso and a female Mari. Got that?

Anyway, as I was saying, I've been knitting and sewing up a Realfee wardrobe.

First thing I tried was a little pair of overalls.

LittleFee overall pattern printed at 86% fits Realfee. Could be slightly smaller.


For these I took the "MyLittleWorld" "AllOver" pattern and had the Littlefee size copied at 86%. I think they turned out quite well!

Next I fussed around with itty bitty pockets. Topstitching those was a challenge!

Pockets for a tiny pair of jeans.


And those itty bitty pockets were added to the back of a pair of itty bitty jeans. These were once again a downsized Littlefee pattern.

LTF jeans at 86% fit RF -- except 1.25" too long!

You remember "Leggy" don't you? He was the model this time.

LTF jeans at 86% fit RF -- except 1.5" too long!

These turned out WAY too long, but I'm going to use them for the Soso anyway. 

Hmm, this post is getting a bit long. I'll continue with the knitted portion of the wardrobe tomorrow.