Translate

Showing posts with label Sashiko. Show all posts

Tuesday, February 02, 2021

Sandhill Sling

 It took awhile, with all the patches and boro like hand stitching, but my Sandhill Sling is finally finished.


I hope to use this small cross-body back pack on dog walks and when hunting for rocks for my mandala paintings. 


It has an outside zippered pocket, the main zippered interior, and an elasticized inside slip pocket.


This is the only construction photo I remembered to take. 


For the most part it wasn't difficult, but there were some "challenging" bits so I wouldn't recommend it for a beginning sewist.

I do intend to make another, possibly for shopping, and for that one I will combine both of the pattern views into one. I'll put the optional snap pocket on the side facing away from the body with the idea of keeping my cell phone there. Then on the side that lies snug against my body I'll put the zippered pocket for more secure storage of my wallet. Inside I'll put a slip pocket on both sides, for more organization. I may also put a D-ring on both sides of the bottom so the strap can be attached to either side. 


Monday, September 09, 2019

From His Closet

Another shirt taken over.


My husband wears denim shirts until they are stained or worn, but won't wear them with patches. At that point I happily take them over and refashion them into something I can, and will, use myself.

In general I'm happy with the oversized, comfortable, forgiving fit, but the sleeves are always way too long. In the past I've remedied the problem by completely removing the sleeves and making a boro vest. This time though the variable weather of fall has inspired me to leave the sleeves on. It makes for a great layering piece I can wear over summer tank tops when the weather decides to turn chilly.


I shortened the sleeves and added contrast cuffs using the tutorial in Paganoonoo's "Patti Blouse" pattern. I then used the original sleeve cuffs, snaps, pleats and all, as big, useful patch pockets. I always need somewhere to stuff my hands!


Hidden inside the left shirt front is an additional pocket, this one for my cell phone. 


I've covered a couple of paint stains with patches which have been embellished with sashiko stitching.


One stain is covered with a big "Judy" flower, tutorial also in the "Patti Blouse" pattern linked to above. The flower is attached with it's brooch pin. Some time in the future I may decide to replace it with an ordinary patch.


The collar of the shirt was worn and fraying so I covered it with fabric that matches the new cuffs.


I receive no compensation for the links I include in my blog. They are only there for your research convenience.

Tuesday, June 25, 2019

Bloggable Gift

I finished this little set up just before I left for ANWG but I was reluctant to blog about it until the gift was opened by the recipient. It is a "set" of sorts for a grand-nephew. He was born months ago so it won't be long until he is able to wear it. I hope the fit will be okay come fall when the weather is cooler!


The sweater is the "Gingersnap Cardigan", knit using a free pattern by Kristen Rettig. Fun, easy knit!


The hat was from an unrelated pattern, the "Sweet and Simple Baby Hat", a free pattern by Debbie Bodner. To help it better coordinate with the cardigan I added matching stripes and concealed the joins using the technique described in the free "Jogless-Join Stripes Baby Hat" pattern by Larissa Gregorin.


The hat might end up being too small by the time the cardigan fits. It was a bit of a guessing game. I chose a cardigan pattern and a hat pattern that were both for "12 months", but of course head to body proportions may vary! 


The little pants were super fun to create. Using "Jalie 3243" as a starting point I cut the pieces from the "good" sections of my husband's old, cast off, brown denim work shirt. 


I then added layers of patches and a variety of Sashiko stitching and distressed them a little by scrubbing with sandpaper. 


I'm really happy with the way they turned out!

Thursday, May 30, 2019

Hardly Rubbish

I'm thrilled with the way this project has turned out. It is not perfect, there are flaws, but I still think it is beautiful. It is also an extremely comfortable and comforting jacket to wear. I love it!


I'm entering the jacket at the 2019 ANWG Conference being held in Prince George, BC, where the theme is "Confluence" and the organizers are encouraging entrants to combine other talents and interests with their weaving. I've chosen to combine my interest in recycling, weaving, sewing, embroidery, and Sashiko (a Japanese form of running stitch embroidery). 


Entrants are required to title their exhibits. I've chosen "What Rubbish" for mine in reference to the recycled denim (strips used in the weaving), recycled bedsheet (used for lining), leftover weaving cotton (used for the Sashiko), and inherited embroidery floss (used for the marigold flowers). All of these materials would usually be thrown away adding to our planet's growing pollution problem. I say, "What rubbish!". 

Sunday, May 19, 2019

Change Of Plans

I'm now working on the lining for the special project I mentioned at the end of April, the one made of yardage woven from denim strips.


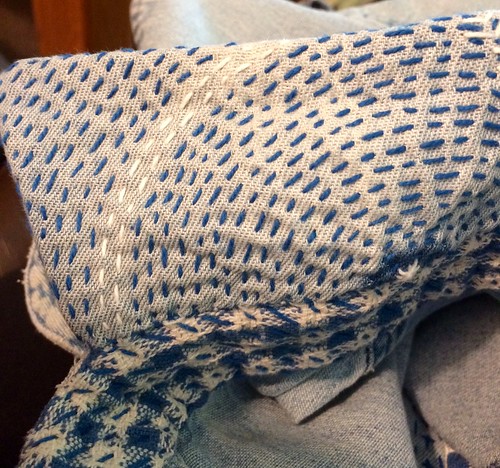
The way the jacket is made the front panels fold back to form a lapel effect and this exposes the lining. I decided to embellish the exposed area of the lining with Sashiko embroidery in the Higaki (Cypress Fence) pattern. Wanting to break up the monotony of the brick like pattern I added a few small flowers I drew myself.  

When the Sashiko was complete I could see that the flower outlines would definitely need some further defining. They were lost in the background of Higaki patterning. (See top portion of the photo). Before work began I suspected this might be the case and had a backup plan to use fabric paint to fill in the flowers. A practice piece made me realize that fabric paints were just not going to work. 

After a couple more false starts, experimenting and casting aside various ideas, I came up with the idea of filling the flowers in with a solid blending stitch known as "long and short stitch". I chose a range of golden yellows so as to not clash with the background Sashiko. As I was working the blending stitch my husband mentioned that they looked like marigolds. I agreed. With the addition of a centre of deeper gold french knots I think they look just like this particular marigold variety.


Monday, October 16, 2017

For Your Safety!

Part of my clutter clearing in my crafting spaces has been picking up projects that have been on hold for some time and working on them. I figure the very act of making some progress on them should clear some of the stuck energy.

In the last few days I've added a couple of textile hobby related quotes to my crafting apron, which is a l-o-n-g term project. I still need ideas for getting knitting, crocheting, and spinning represented.


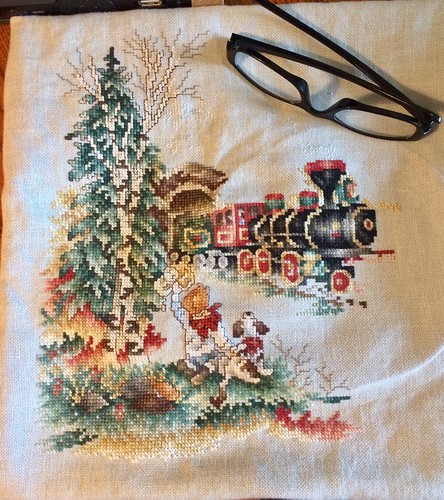
I work on my cross-stitch picture for about an hour every morning while I have my coffee. It's a large picture with lots of colour changes and it's done on 28 count linen. Progress is very, very slow.

October 16, 2017

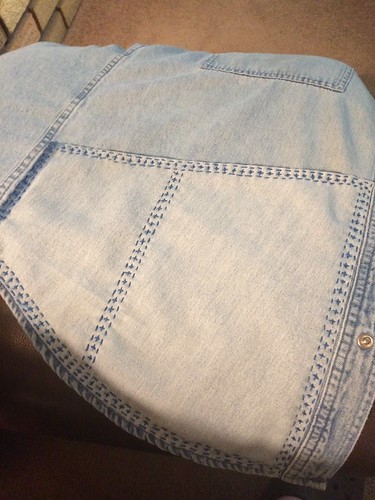
I've added to my Sashiko/Boro vest.

Boro/Sashiko

The back is sort of finished for now. I say "sort of" because the intent is for this to be a perpetual project. I'll be adding patches and further embellishment in the Boro style, over the years, as the garment wears and needs further patching.

I've now moved on to the front where I've added a few patches (legitimate ones, over holes and very worn sections of the original shirt),

A little progress on the front.

and a whole lot of stitching.

Sashiko. Komezashi (rice stitch)

The vest is so comfy that between each addition I try to keep it wearable as is.

Friday, June 09, 2017

Love That Internet

I have a love/hate relationship with the Internet. Sometimes it seems to be the biggest time thief ever, hours from one's day missing and little to show for it. Let's face it, none of us are getting any younger! Knowing that, I like to make every moment count, and time spent chasing useless Facebook side links is not what I want to see when I look back on the moments of my life!


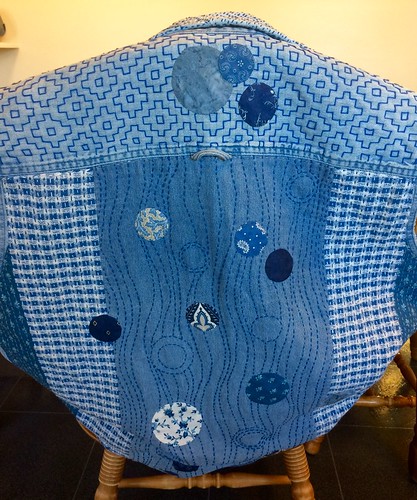
On the other hand, the Internet can be a wonderful, handy, economical teacher, accessible at any hour of any day, and right when you need it. For instance, when I decided to use circles as design elements on the back of my denim Boro/Sashiko vest, I realized I had barely any experience with applique, and no experience at all with how to get a really nice, smooth edge on a circular applique. 

Enter the Internet wonder world of YouTube instructional videos. Pretty much anything you want to learn can be found on YouTube videos. Not just one instructor or method, but many to choose from. I watched several and finally decided that the one I've embedded here would be the one I used. It seemed to be just the right fit for me. It appealed to the perfectionist in me and yet skipped the tedious hand gathering stitches of some of the other methods.


The loose pile of circles pictured above was a photo taken several days ago. I've now selected the ones I'm going to use, have appliqued them to the centre back panel, and I'm well on my way to stitching the background in a Sashiko inspired manner. More photos of that when that section is complete.

Tuesday, May 30, 2017

Inspired by Boro

"Boro" is perpetual mending and patching that can extend the life of a garment indefinitely.  The technique originated in rural Japan. "Sashiko" is a form of Japanese folk embroidery that uses a basic running stitch to create a patterned background.

Collar and collar stand

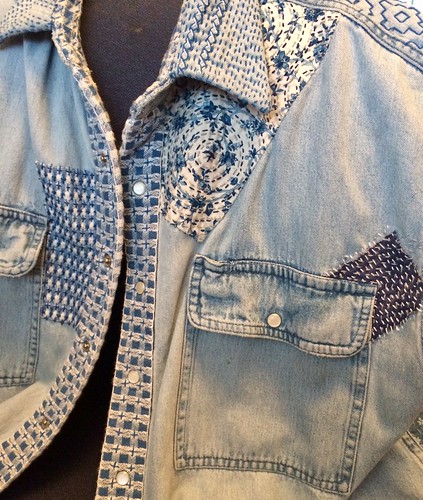
Inspired by examples of boro and sashiko online, I've started a very long term boro/sashiko inspired project. Only "inspired by" because true boro was born of necessity, to extend the life of expensive cotton textiles and sashiko has rules I don't intend to follow strictly and a uniformity I am not yet able to achieve. This is just for fun and to create a comfortable, functional, and one of a kind garment for myself. 

My husband had a denim shirt hanging in his closet that was worn beyond the point of being wearable for anything other than painting and messy household chores. In fact, it has a few paint and spackle stains that I'll eventually cover with patches!


Boro shirt beginning.

I started by removing the sleeves since they were far too long for me anyway. I then used the fabric salvaged from the sleeves to fashion large, functional pockets along the lower edge of the shirt. The narrower pocket, close to the hip, is just the right size to hold my cellphone. Another just like it on the other side of the shirt will be handy for my reading glasses.
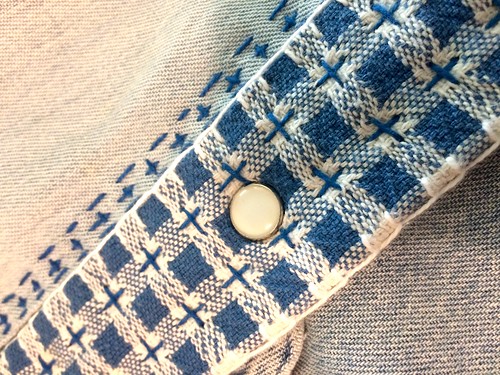
Working around the snaps of the Boro vest.

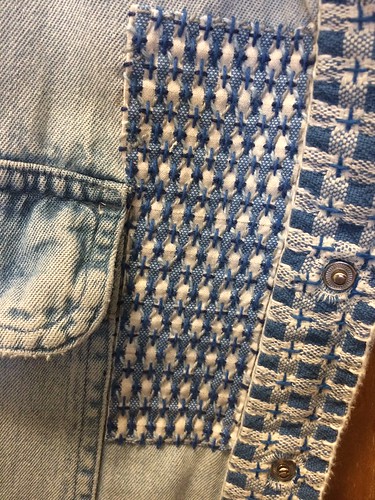
I then started in replacing the very worn areas of the collar stand and front button band with material repurposed from an old dish towel. With the addition of boro embroidery to hold the layers together and add an element of decoration, I quite like the way it looks. 

Of course covering the button bands with material also covered up the snaps, which I wanted to remain functional. It wasn't too difficult to snip tiny holes in the patching material and stretch it over the snaps, tucking the ends into a slim groove in the snap itself. Well -- it worked for both the top and the bottom of the "female" end of the snap anyway.
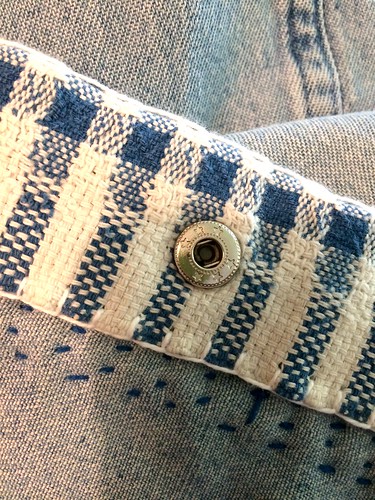
Working around the snaps of the Boro vest.

Uncovering the "male" portion of the snap was considerably more difficult because there was no groove to hide loose ends in. After some experimenting I ended up snipping a larger hole, turning the ends under, and stitching all around with a blanket stitch. Not as neat, but at least functional. That side won't be visible when the vest is worn anyway.
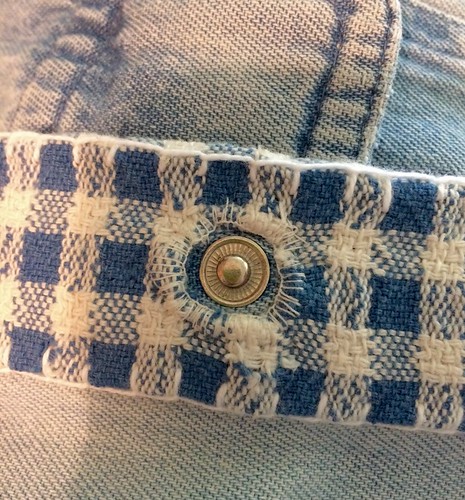
Working around the snaps of the Boro vest.

You'll be hearing more about this project in the weeks, months, and perhaps years to come. Once I get the initial patching and embroidery done I'll be wearing this vest a lot, perhaps only in the house, but maybe for walking the dog or camping as well. As the vest gets worn out further I'll just keep patching it!